
How to Prepare a Room for a Home Gym

Turning a spare room, basement, garage, or bedroom into a home gym works best when you plan the room around the workout you actually want to do. A strength-focused setup has different needs than a cardio corner or a mixed-use fitness room. If you buy equipment first and figure out the room later, you often end up with cramped clearances, poor airflow, and flooring that doesn’t match the load.
A better approach is to define the gym before you move anything in. Decide whether the room will hold a treadmill, a bench and dumbbells, a rack, kettlebells, yoga space, or a mix of those items. That choice affects everything else: floor protection, ceiling height, outlet placement, noise control, and storage.
If you’re still deciding how to divide living space from workout space, it can help to know that you do not need a whole room dedicated to fitness. Some homeowners separate a workout area from the rest of the home with sliding doors, pocket doors, glass walls, or even a folding divider, depending on budget and permanence. Extra Space Storage has a practical overview of these room-separation ideas.
Define the Gym You Want to Build
Before you measure anything, write down what the room needs to support.
A compact dumbbell-and-bench setup needs less preparation than a room built around a treadmill or a heavy rack. Cardio equipment brings motion, vibration, and power needs. Strength training brings impact, floor protection, and clear lifting space. Mobility work and yoga need open floor area more than storage.
A useful way to think about it is this:
- Cardio-first room: prioritize ventilation, outlets, and noise control
- Strength-first room: prioritize flooring, floor load awareness, and clearances
- Mixed-use room: balance open space, storage, and durable surfaces
- Temporary or renter setup: keep changes reversible and avoid permanent mounting
If your budget is limited, build the room for the most demanding piece of equipment you plan to use regularly. A room that works for dumbbells and a bench may not be ready for a treadmill or a loaded rack without additional prep.
Choose the Best Room for Your Home Gym
The best room is not always the biggest room. It is the one that fits your equipment, your noise tolerance, and your willingness to make changes.
Quick room-decision checklist
Use this simple checklist to narrow down the room:
- Choose a garage if you need space for larger equipment, can handle temperature swings, and want a setup that may stay in place long term.
- Choose a basement if you want a quieter room and can manage moisture risk and ceiling-height limits.
- Choose a spare bedroom if your setup is lighter, quieter, and more reversible, such as dumbbells, a bench, yoga, or bands.
- Choose another room if it is already finished, has enough airflow and ceiling height, and can support the equipment without major changes.
Then match the room to the equipment:
- Treadmill: garage or finished basement if the floor is level, the room has airflow, and vibration will not be a problem; avoid a bedroom unless the machine is compact and the room can handle noise
- Rack or loaded barbell setup: garage or structurally sound basement with strong flooring, enough ceiling height, and room for bar path and spotting
- Dumbbell-only setup: spare bedroom, bonus room, or finished basement can work well if you keep the footprint compact
- Mixed-use setup: basement or larger spare room if you need a balance of open floor, storage, and quieter equipment
Garage
A garage usually offers the most flexibility for larger equipment. It can handle a rack, bike, treadmill, or sled-style training better than many bedrooms or living rooms. The trade-off is comfort. Garages often need help with temperature swings, dust, and moisture. They may also need better lighting and more attention to floor insulation.
Basement
Basements can be a strong option for a home gym if they are dry, quiet enough for your household, and tall enough for the equipment you want to use. The downside is moisture risk. Before you bring in flooring or equipment, check for leaks, damp concrete, condensation, or musty odors. If the basement has a history of water intrusion, address that first.
Spare bedroom
A spare bedroom works well for smaller, quieter setups. Think adjustable bench, dumbbells, kettlebells, resistance bands, yoga mat, and a mirror. The limitation is space. Bedrooms rarely work well for large cardio machines, heavy racks, or anything that needs generous clearance.
Other spaces
Unused dining rooms, bonus rooms, and finished attics can also work if the structure, temperature, and access are suitable. HGTV has examples of ordinary rooms turned into functional workout spaces, including setups that rely on a rug, mirror, and simple storage rather than a full commercial-style build. HGTV is a useful source for seeing how small, lived-in rooms can be adapted without overbuilding.
Measure Space, Ceiling Height, and Clearances
Measure the room as if the equipment is already there.
That means more than wall-to-wall dimensions. You also need to account for:
- doorway width and turning space for moving equipment in
- ceiling height for overhead pressing, pull-up work, or taller cardio machines
- clearance around benches, racks, treadmills, and bikes
- open floor for stepping, stretching, and getting on and off equipment safely
A room can look large enough until you add a treadmill footprint, a bench that needs room behind it, and a path to walk around both. For open-floor workouts like mobility work, aerobic step, or dance-style training, plan the open area first and place bulky items around it rather than the other way around. That approach is consistent with home gym organization guidance from Home with B.
A few rule-of-thumb spacing examples can help:
- Bench: leave enough room to lie down fully and to step to the sides without brushing a wall
- Treadmill: leave extra space behind the machine and enough side clearance to step on and off safely
- Rack: leave space in front for lifting, behind for loading or spotting, and overhead for the bar path if you press inside the rack
- Dumbbell zone: reserve a small open area where you can press, row, or lunge without hitting furniture or storage
If you’re using a rack or pull-up setup, ceiling height becomes even more important. Also check light fixtures, beams, and low-hanging ductwork. A room that technically fits the equipment may still feel unsafe if you can’t move naturally through the space.
Check for Moisture, Structure, and Floor Load Limits
Before installing flooring or moving in heavy equipment, inspect the room for structural and moisture issues.
Look for:
- water stains on walls or ceilings
- soft spots in flooring
- visible mold or mildew
- condensation on windows or concrete
- sagging floors or uneven surfaces
- cracks or signs of past leaks
You can also look for practical signs that the floor or subfloor may need more than surface protection. Watch for bouncing or noticeable springiness when you walk, dips that make a bench wobble, tiles that separate, squeaks that have gotten worse over time, or spots where the floor feels soft underfoot. In a basement, flaking concrete, repeated dampness, or a floor that stays cool and wet after cleaning can also signal a moisture problem that should be addressed before you add equipment.
Basements and garages deserve extra attention here. Moisture can damage flooring, rust equipment, and create lingering odors. If you’re setting up a room with a heavy rack, loaded plates, or a treadmill, be cautious about the floor’s ability to handle concentrated weight and movement. If the floor seems uneven, springy, damaged, or visibly deteriorated, or if you suspect the subfloor or foundation may be compromised, bring in a qualified professional rather than guessing.
This is also the point to decide whether the room needs only surface protection or a more serious structural review. Surface protection can help with scuffs, vibration, and impact from normal home-gym use. It does not fix a floor that is sagging, soft, water-damaged, or structurally questionable. A few dumbbells on rubber flooring are very different from a heavily loaded strength room.
Plan the Layout Before Moving in Equipment
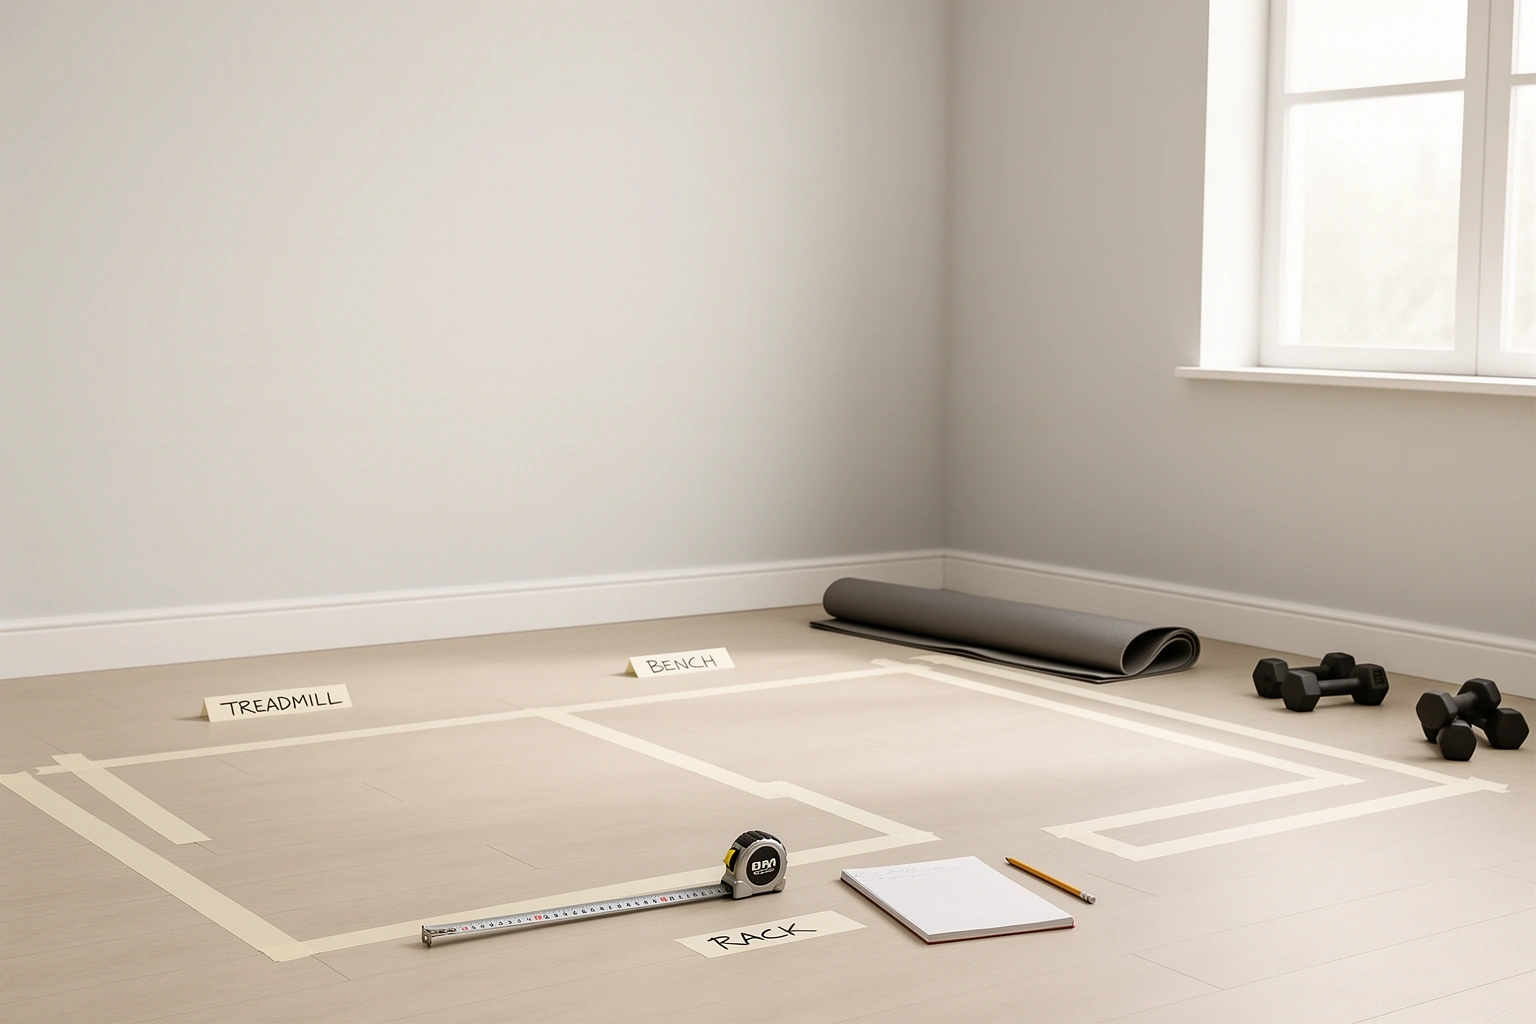
Lay out the room on paper or with painter’s tape before anything is installed.
A practical order is:
- Mark the open movement zone.
- Place the largest item first.
- Add secondary equipment around it.
- Leave access to outlets, windows, and doors.
- Reserve storage space for small items.
Bulky items such as a treadmill, bench, and bike should ideally stay out of the main traffic path. If possible, place equipment near outlets so cords can be kept short and out of the way. That reduces clutter and trip hazards.
A simple example: in a spare bedroom, you might put a bench along one wall, a dumbbell rack opposite it, and leave the center open for floor work. In a garage, you may dedicate one side to a rack and weights, with a separate open strip for warm-ups or mobility.
For a treadmill, plan for a clear walking path on at least one side and enough room at the rear so the machine does not feel boxed in. For a rack, keep the front of the rack open enough that you can step back, rerack safely, and move around during setup. For a dumbbell-only room, a smaller footprint can still feel crowded if storage, a bench, and a mirror all compete for the same wall.
If the room doubles as a living space, use a divider or partial separation to keep the gym visually and physically distinct. That makes the room easier to maintain and helps prevent equipment from spreading into the rest of the house.
Choose the Right Flooring for Impact, Comfort, and Durability
Flooring is one of the most important prep decisions because it affects comfort, noise, stability, and floor protection.

Rubber flooring
Rubber gym flooring is often the most versatile choice for a serious home gym. It handles dropped weights better than soft foam, offers a stable base for lifting, and helps protect the subfloor. It also tends to perform better in mixed-use rooms where you want durability without a lot of movement underfoot.
Interlocking foam tiles
Foam tiles are easier to install and more comfortable for floor exercises, stretching, and light bodyweight work. Their trade-off is stability and durability. They are not the best choice for heavy dumbbells, racks, or repeated impact from cardio machines.
Horse stall mats
Horse stall mats are a common option in garage gyms because they are heavy-duty and can provide a cost-conscious way to cover a larger area. They work well under racks, benches, and free weights. The downside is handling and fit. They are heavier to move and may feel less refined in a finished room.
Underlayment and layered approaches
In some rooms, a layered floor makes sense. For example, a basement gym might use a moisture-appropriate base layer with rubber on top, while a renter might use foam tiles under a lighter setup and add a separate mat under a treadmill. The best choice depends on the equipment, the floor below it, and how permanent you want the room to be.
A useful comparison:
| Flooring type | Best for | Trade-off |
|---|---|---|
| Rubber flooring | Mixed-use, strength training, general durability | Higher cost and heavier installation |
| Foam tiles | Stretching, bodyweight work, temporary setups | Less stable under heavy equipment |
| Horse stall mats | Garage gyms, weights, racks, impact protection | Bulkier and less polished finish |
Protect the Walls, Doors, and Mirrors
Wall protection matters most in small rooms where weights, benches, and people move close to the perimeter.
If you plan to use a mirror, place it where it helps with form checks but won’t be in the direct path of equipment or swinging weights. A full-length mirror is useful in a yoga or dumbbell setup, but it should be mounted securely and positioned away from likely impact zones.
For walls, consider simple protection where equipment may scrape or bump. That can be as basic as a protective panel or a durable wall covering in high-contact areas. Doors should also be checked for swing direction and clearance. A door that opens into the workout zone can interfere with a bench or bike.
If you are using mounted storage or wall accessories, make sure they are installed appropriately for the wall type. Do not assume drywall alone is enough for heavy items.
Set Up Ventilation, Temperature Control, and Humidity Management
A room that feels fine as storage may become uncomfortable once you start training in it.
Ventilation matters because workouts raise heat and humidity quickly. Garages often need fans or HVAC support. Basements may need dehumidification. Bedrooms may need window access or a ceiling fan, depending on the room.
A few practical rules:
- If the room gets stuffy during a short workout, improve airflow before adding more equipment.
- If the room smells damp, address moisture before installing flooring.
- If windows exist, use them when weather allows, but do not rely on them alone.
- If humidity is a recurring issue, a dehumidifier may be more useful than another fan.
The goal is not just comfort. Excess moisture can affect flooring, metal equipment, and the room’s long-term condition.
Plan Lighting and Electrical Access
Good lighting makes the room easier to use and safer to move through.
Bright, even light helps with form checks, cleaning, and finding small accessories. A single dim overhead fixture may not be enough for a gym, especially if the room is deep, windowless, or used for detailed lifting work. If the room allows it, combine overhead lighting with task lighting or brighter bulbs where needed.
Electrical planning matters just as much. Place equipment near outlets when possible so cords do not cross walkways. Keep fans, treadmills, and other powered equipment from creating a tangle of extension cords. If you must use cords, manage them carefully and avoid running them through high-traffic areas.
For any room with moisture concerns, be especially cautious around outlets and floor-level wiring.
Reduce Noise and Vibration Before They Become a Problem
Noise control is easiest to handle before the room is full of equipment.
Rubber flooring helps, but placement also matters. Keep high-impact equipment away from shared walls if possible. In apartments, bedrooms, or upstairs rooms, vibration can travel farther than you expect. A treadmill in one corner may still be heard in another room if the floor transmits movement.
If the room is near neighbors or sleeping areas, prioritize:
- thicker or denser flooring under impact zones
- equipment placement away from shared walls
- stable storage so items do not rattle or tip
- softer handling of weights and benches
This is where the garage-versus-bedroom trade-off becomes obvious. A garage may offer more space, but it can transmit vibration to adjacent rooms or the structure above. A bedroom may be quieter to the rest of the house, but it usually limits what you can safely place inside.
Add Storage and Organization That Fits the Space
Storage should support movement, not compete with it.
Group similar items together: weights with weights, kettlebells with kettlebells, bands with bands. Keep smaller accessories off the floor so they do not become tripping hazards. Wall-mounted or vertical storage works well when floor space is tight, but only if it is secure and appropriate for the wall type.
A good small-gym layout often includes:
- one rack or shelf for dumbbells
- one spot for kettlebells
- a bin or hook system for bands, straps, and mats
- a clear place for towels and water
- a small area for cooldown tools like foam rollers
HomewithB’s organization guidance also notes that smaller items such as resistance bands should stay off the floor, which is a practical rule for any compact gym. Home with B is especially useful if you are planning around limited square footage.
Decide What to Buy First for a Small Home Gym
If you are building the room in stages, buy in this order:
- flooring and basic protection
- storage
- mirrors or wall protection
- climate and lighting upgrades
- equipment
That sequence prevents the common mistake of buying a treadmill or rack before the room is ready.
For a small home gym, the most versatile first pieces are often:
- adjustable dumbbells or a modest dumbbell set
- an adjustable bench
- kettlebells
- resistance bands
- a mat for floor work
These items work in many room sizes and do not lock you into a single training style. Once the room is proven to work, you can add larger equipment with more confidence.
Adapt the Setup for Renters or Temporary Spaces
Renters need a gym that works without creating a permanent project.
A reversible-only setup usually means:
- Safe without permission: freestanding storage, interlocking flooring, removable mats, portable mirrors, freestanding fans, and non-permanent room dividers
- Usually needs permission: drilling into walls, anchoring heavy racks, installing built-ins, changing electrical work, modifying doors, or attaching anything that could damage the unit
- Avoid unless your lease clearly allows it: glued-down flooring, permanent wall mounts, structural changes, or any change that could leave lasting holes, stains, or damage
A good renter path is to start with a compact dumbbell-and-bench setup, add removable flooring, and keep everything freestanding. If you later move into a place where permanent changes are allowed, you can upgrade the room with more permanent storage or wall protection.
Estimate the Prep Work, Budget, and Order of Operations
A realistic home gym conversion usually follows this order:
- empty and clean the room
- inspect for moisture, damage, and structural concerns
- measure space, ceiling height, and clearances
- choose flooring
- plan outlets, lighting, and airflow
- add wall protection and storage
- bring in equipment
- test the layout and make adjustments
That sequence keeps you from redoing work later. For example, if flooring goes in after the rack and bench are already installed, the project becomes harder than it needs to be.
To estimate prep work before you buy equipment, think in terms of room type and load:
- Spare bedroom with dumbbells and a bench: usually needs flooring, storage, and lighting adjustments more than structural work
- Garage with a treadmill or mixed-use setup: often needs flooring, climate control, dust management, and electrical planning
- Basement with a rack or heavy weights: may need moisture control, floor review, and possibly professional input before equipment arrives
- Renter setup: usually costs less to change structurally, but may need more in portable flooring, freestanding storage, and reversible protection
Budget-wise, the biggest prep categories are usually flooring, climate control, lighting, and storage. If you are deciding where to spend first, prioritize the items that protect the room and make the gym usable every day.
Common Mistakes to Avoid When Preparing a Home Gym Room
The most expensive mistakes are usually simple ones:
- choosing a room without checking moisture
- forgetting ceiling height for overhead movements or tall equipment
- underestimating how much open space you need
- using soft flooring under heavy equipment
- ignoring vibration in shared walls or upstairs rooms
- placing cords across walking paths
- buying large equipment before confirming the layout
- leaving small items scattered on the floor
- making permanent changes in a space that should stay reversible
Avoiding those problems is less about perfection and more about sequencing. Measure first, protect the room second, and buy equipment last.
When to Consult a Professional
Bring in a professional if you suspect structural issues, recurring moisture, or electrical limitations. That is especially important if you plan to install a heavy rack, use a loaded platform, or convert a basement or garage that already has signs of damage. A qualified contractor, electrician, or structural specialist can help you understand whether the room is suitable before you invest in flooring and equipment.
FAQ
How much space do I need for a home gym?
It depends on the equipment and the type of training. A small room can work for dumbbells, a bench, and floor exercises if you preserve enough open space to move safely. Larger equipment like a treadmill or rack needs more room around it.
Can I put a home gym in a bedroom?
Yes, if the setup is quiet, compact, and easy to store. Bedrooms work best for lighter equipment, bodyweight training, yoga, and adjustable dumbbells. They are usually not ideal for heavy impact or large machines.
Do I need to reinforce the floor for heavy equipment?
Not always, but you should not assume the floor is fine without checking. Heavy racks, loaded plates, and some cardio machines deserve extra caution, especially in older homes or upstairs rooms. If you are unsure, get professional guidance.
What flooring is best for a home gym?
Rubber flooring is often the most versatile choice for durability and impact protection. Foam tiles are better for light, temporary setups. Horse stall mats are a strong option for garage gyms and heavier equipment.
What should renters do differently?
Renters should favor reversible changes: freestanding storage, removable flooring, and non-permanent wall protection. Avoid anything that requires structural changes unless you have permission.
Should I put mirrors in a home gym?
Mirrors are useful for form checks and making a small room feel more open, but they should be installed securely and kept away from likely impact zones. In tight rooms, placement matters as much as size.
What should I buy first for a small home gym?
Start with flooring, then storage, then the core equipment you will use most often. For many small setups, that means an adjustable bench, dumbbells, kettlebells, and bands before larger machines.
How do I know if a basement is too damp for a gym?
If you see leaks, smell mildew, notice condensation, or find damp concrete, address that before installing equipment. Moisture problems can damage flooring and equipment and make the room unpleasant to use.