
How to Make a Home Gym Safe

A home gym should make training more convenient, not more hazardous. The main risks are usually predictable: equipment tipping, poor flooring, cramped clearances, electrical hazards, bad ventilation, and clutter that turns a workout into a trip or impact injury. If you address those issues before you start lifting or running, you reduce the chance of accidents and make the space easier to use consistently.
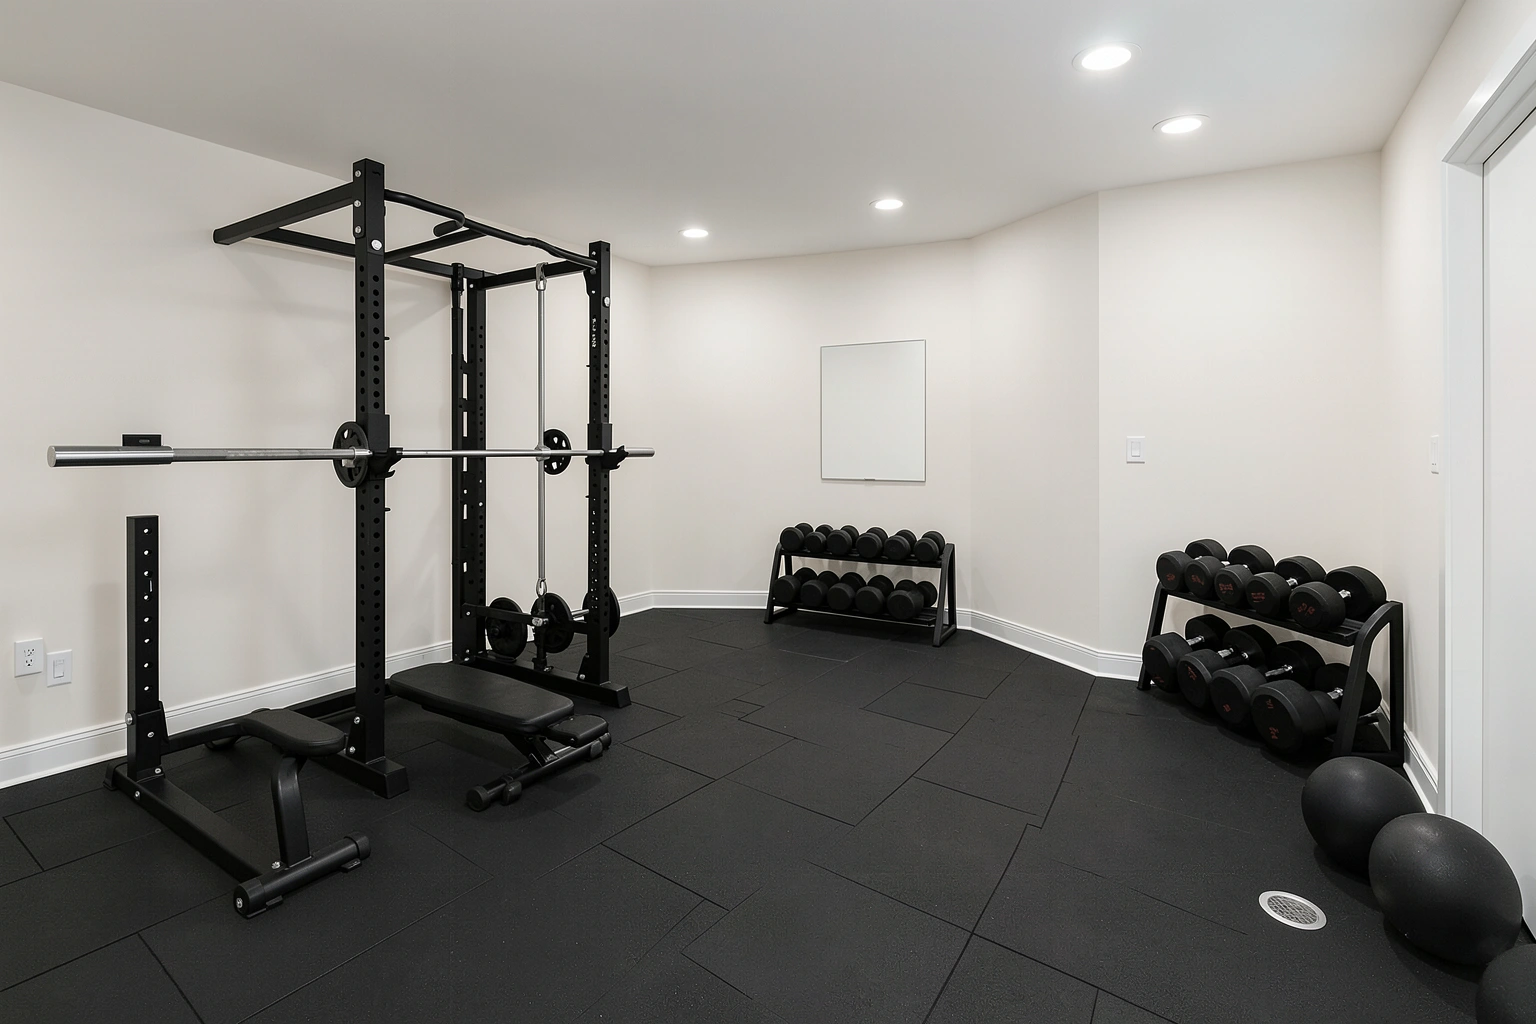
A safer setup also protects the equipment itself. A treadmill on the wrong surface can shift or wear unevenly. A rack placed on an unstable floor can wobble. Dumbbells left in a walkway become a hazard every time you step back from a bench or reach for a plate. Safety in a home gym is mostly about planning, placement, and routine checks.
Why Home Gym Safety Matters
The biggest home gym injuries often come from ordinary mistakes rather than extreme lifts. A person can strain a back by lifting from a poor setup, clip a wall with a dumbbell during a press, or slip on a thin mat that slides underfoot. In shared spaces, the risks increase because children, pets, and household traffic add movement around the workout area.
There is also a difference between a gym you can use once and a gym you can use safely every week. A room that feels fine for a single session may become frustrating or dangerous if it is too tight, too hot, poorly lit, or difficult to reset after each workout. The goal is not to make the space look like a commercial facility. The goal is to make it stable, clear, and predictable.
For equipment-specific guidance, always follow the manufacturer’s manual and installation instructions. For example, a treadmill’s safety key, a rack’s anchoring guidance, or a bench’s weight rating should come from the product documentation, not guesswork. General safety advice helps, but the manual should settle the details.
Assess Your Space Before Buying or Moving Equipment
Before you bring equipment in, measure the room with the workout itself in mind. A rack may fit on paper and still be awkward if a barbell path runs into a door swing or a bench blocks a walkway. Leave room not only for the footprint of the machine, but also for the movement around it.
A practical way to plan is to map three zones:
- the equipment footprint
- the movement zone around it
- the walkway needed to enter, exit, or move between items
Use the following clearance ranges as a practical starting point, then adjust for your room and the manufacturer’s instructions:
- Treadmills: leave about 2 to 3 feet on each side and at least 6 feet behind the deck so you have room to step off if needed. Keep the front area clear for the console and emergency stop access.
- Power racks: leave about 3 feet in front for loading, unracking, and moving the bar, and 2 to 3 feet on the sides if possible. If you bench inside the rack, make sure you can walk around the ends without squeezing past plates or uprights.
- Benches: allow enough room for the full bench length plus space to walk around both sides. In practice, that usually means at least 2 feet on each side and extra room at the head and foot ends so you are not forced into a wall or other equipment.
- Dumbbell areas: keep a clear zone around the rack or stand so you can pick up and return weights without twisting or stepping backward into clutter. If you use an adjustable bench nearby, leave enough room to lie back, stand up, and re-rack weights without clipping anything.
For a bench press setup, that means space behind the bench, space to each side for loading plates and moving around the bar, and enough room at the head end so you are not pressed against a wall. For a treadmill, it means space behind the deck and enough side clearance to step on and off safely.
Ceiling height matters too. Overhead pressing, pull-up bars, and some cable machines need more vertical room than a simple dumbbell area. If the ceiling is low, choose exercises and equipment that do not force you to work close to the ceiling or light fixtures.
A tape measure and a floor plan sketch are enough to avoid many expensive mistakes. If the room will be shared with storage, laundry, or household access, mark those paths first. Equipment should fit around the room’s real traffic pattern, not just the empty floor.
Choose the Safest Flooring for Your Training Style
Flooring affects impact absorption, traction, noise, and equipment stability. The best surface depends on what you do most often.
| Flooring type | Safety strengths | Main limitations | Best use case |
|---|---|---|---|
| Rubber gym flooring | Stable, durable, good shock absorption, helps reduce slipping and noise | Heavier and usually more expensive than foam | Free weights, racks, treadmills, mixed training |
| Foam flooring | Softer underfoot, easy to install, light | Less stable under heavy equipment, can compress or shift | Light bodyweight work, stretching, low-impact training |
| Carpet | Comfortable, can reduce noise, common in spare rooms | Less ideal for stability, cleaning, and heavy equipment support | Very light training or temporary setups |
For mixed-use home gyms, rubber gym flooring is usually the best starting point because it handles a wider range of training styles: racks, benches, dumbbells, and cardio equipment. It is the most practical choice when you need one surface that can support both heavy lifting and general movement.
Thickness and density matter as much as material. For safety, choose rubber that is thick and dense enough to stay flat under load and resist compression from racks, benches, and dropped weights. Very thin or low-density rubber may look fine at first but can feel less stable, especially in free-weight areas. If you expect heavy lifting, prioritize a denser, more impact-resistant product rather than a soft mat that feels cushioned but shifts or compresses too easily.
Foam can work for yoga, mobility, or light floor exercise, but it is usually not the best surface under a rack, bench, or loaded dumbbell area. Carpet is better than a slippery hard floor in some cases, but it can hide small objects, trap moisture, and make equipment feel less secure.
If you are in a rental and cannot install permanent flooring, consider interlocking rubber tiles or mats that can be removed later. Just make sure they lock together tightly and do not curl at the edges.
Set Up Equipment for Stability and Safe Clearances
Once the floor is ready, place each piece of equipment so it can be used without collision risk. The most common mistake is crowding the room. A bench tucked too close to a wall can trap elbows or the bar path. A treadmill placed with no side clearance makes it harder to step off safely if you lose balance.
Use these placement rules:
- Keep walkways open between equipment and exits.
- Leave room for the full range of motion, not just the machine’s footprint.
- Place heavy items on level ground.
- Avoid setting equipment where a door can hit it or where a cable can cross a path.
- Keep dumbbells and plates far enough from benches that you can sit, lie down, and stand up without turning sideways.
A power rack should sit on a stable, level surface with enough room to load a barbell and move around the front and sides. A bench needs enough space for setup, unracking, and re-racking without twisting or stepping backward into clutter. Cardio machines should have clear access to the controls and emergency stop features.
If the floor is uneven, fix that before adding weight. Shimming a rack or machine may solve a small wobble, but do not treat shims as a cure for a bad surface. If the floor flexes or slopes noticeably, choose a different location or consult a professional.
Decide When to Anchor Equipment
Anchoring helps when equipment is tall, top-heavy, or likely to shift during use. That includes some racks, storage towers, and certain cardio machines. Anchoring can also improve safety in homes with children or active pets, where a small bump can turn into a tip-over risk.
Use this decision rule: if the equipment wobbles, lifts at the base, or can be pulled forward during normal use, it needs more stability. If the manufacturer recommends anchoring, follow that guidance exactly. If the item is intended to be freestanding, do not improvise with random hardware.
Homeowners usually have more options for wall or floor anchoring, but renters often need freestanding alternatives or landlord-approved installation. In a rental, prioritize equipment with a broad base, lower center of gravity, and built-in stability rather than relying on permanent fixes.
For wall-mounted or ceiling-mounted equipment, installation should match the manufacturer’s load and mounting instructions. That is not the place to estimate. If the mounting surface is questionable, or if the hardware needs to support dynamic movement, bring in a qualified installer.
Make Solo Training Safer
Training alone is common in a home gym, so the setup should assume there is no spotter unless you plan for one. For barbell work in a rack, safety bars or spotter arms are the main fail-safe. They are not interchangeable in every setup, so choose the option that matches your rack and the exercises you do.
Use safety bars or spotter arms whenever a failed rep could trap you under the bar. That includes bench press, squats, and other barbell lifts where you cannot safely bail out without help. Set them at the right height before you load the bar, and test the setup with an empty bar first. If your rack supports both, use the option that gives the most reliable catch point for the lift you are doing.
A good rule is this: if you would not feel comfortable missing the rep alone, use safety hardware or switch to a safer variation. For example, a power rack with safety bars is a better choice for solo barbell squats and bench press than an open setup. Spotter arms can work well when the rack design and lift path make them the better fit, but they still need to be set correctly and checked before each session.
For some lifts, machines are simply the safer solo option. A machine chest press, leg press, lat pulldown, or cable station may be more appropriate than a free-weight version when fatigue, balance, or setup complexity would make a missed rep harder to manage. Free weights are more versatile, but they require more planning because there is no built-in stop if the rep fails.
Dumbbells can be easier to bail out of than a barbell in some situations, especially for pressing movements. But that does not make every dumbbell lift safe to do alone without thought. Keep the path around the bench clear, and do not press heavy dumbbells if the room is so tight that a missed rep could clip a wall or other equipment.
A useful solo-lifting habit is to test the bailout path before you start. Know where the bar will go if you miss a rep, and make sure nothing blocks that path. Mirrors can help you check alignment, but they do not replace safety bars, proper setup, or good judgment.
Store Weights, Bands, and Accessories Without Creating Hazards
Storage is a safety issue, not just an organization issue. A pair of dumbbells left beside a bench can become a trip hazard. Plates stacked on the floor can roll. Resistance bands tossed into a pile can tangle around feet or equipment.
Keep heavy items low and stable. Dumbbells and kettlebells should sit on a rack or shelf that can handle the weight without tipping. Plates should be stored where they cannot roll into walkways. Smaller accessories like collars, handles, and bands should have a dedicated bin, drawer, or wall hook system.
Avoid stacking weight plates where they can be knocked over by a passing foot or pet. If you use wall-mounted storage, make sure it is installed securely and rated for the load. For temporary setups, a simple floor rack or storage cart is safer than a tall, unstable stack.
The main rule is that nothing should live on the floor unless it is actively being used. A clear floor is safer, easier to clean, and less likely to hide a loose clip or small plate.
Improve Lighting, Ventilation, and Temperature Control
A safe gym is easy to see and comfortable to breathe in. Poor lighting makes it harder to judge foot placement, read machine settings, and notice loose equipment. A dim garage or basement can create avoidable mistakes, especially around steps, cords, and free weights.
Use bright, even lighting that reaches the floor and the corners of the room. If a mirror is part of the setup, place it so it helps you check form without reflecting glare into your eyes. Mirrors are useful for awareness, but they should not be the only way you monitor movement.
Ventilation matters because indoor exercise raises heat and humidity. In a garage or basement, stale air can build up quickly, especially with cardio equipment or multiple people training together. A ventilation fan, open window, or HVAC support can help move air and reduce moisture buildup. That matters for comfort and can also reduce the chance of rust, mildew, and slippery surfaces.
If the room gets hot or damp, address that before training hard in it. Temperature swings are especially common in garages, while basements can hold moisture. For general indoor air quality and moisture guidance, official resources like the U.S. Consumer Product Safety Commission and ENERGY STAR are useful starting points.
Handle Electrical and Cord Safety Correctly
Home gyms often need power for treadmills, fans, lighting, speakers, or cable machines. That creates a mix of electrical and trip hazards if cords are routed carelessly.
Use grounded outlets and follow the equipment manual for power requirements. In garages, basements, and other damp areas, GFCI protection is a common safety measure because it helps reduce shock risk in the event of a fault. If the room’s electrical setup is outdated or uncertain, have a licensed electrician review it.
Avoid running extension cords across walkways. If a cord must cross a path temporarily, it should be protected and placed where it cannot be stepped on repeatedly or trapped under equipment. Never tuck cords under unstable mats or rugs where heat and wear can build up unnoticed.
Treadmills deserve special attention because they combine power, motion, and a moving belt. Keep the belt area clear, attach the safety key before use, and stop using the machine if the belt slips, drifts, or makes unusual noise. For electrical safety in home settings, NFPA guidance is a useful reference point for fire and wiring concerns.
Use Equipment-Specific Safety Checks
Different equipment needs different checks. A general glance is not enough if the gym includes several machine types.
Treadmills
Check that the safety key is attached and functioning. Make sure the belt area is clear before starting. Listen for unusual scraping, slipping, or belt drift. If the machine shakes or shifts while running, stop and inspect the base and floor contact.
Power racks and benches
Check bolts, J-hooks, safety bars, and spotter arms before each session. Make sure the bench sits level and does not slide when you sit down or unrack a bar. If the rack has any wobble, do not load it until the cause is fixed.
Resistance bands
Inspect bands for cracks, thinning, or small tears. Bands can fail suddenly when worn, so replace them as soon as you see damage. Keep them away from sharp edges and direct heat.
Cables and pins
Look for fraying, uneven movement, bent pins, or sticking pulleys. A cable that feels rough or looks worn should be taken out of service until it is repaired or replaced.
Plates, dumbbells, and collars
Check for cracks, loose handles, or damaged locking collars. Make sure plates are seated properly before lifting. A collar that slips is a simple problem with serious consequences.
Create a Simple Pre-Workout and Maintenance Routine
A short routine is more effective than occasional deep cleaning. Use a home gym safety checklist that is quick enough to do every time.
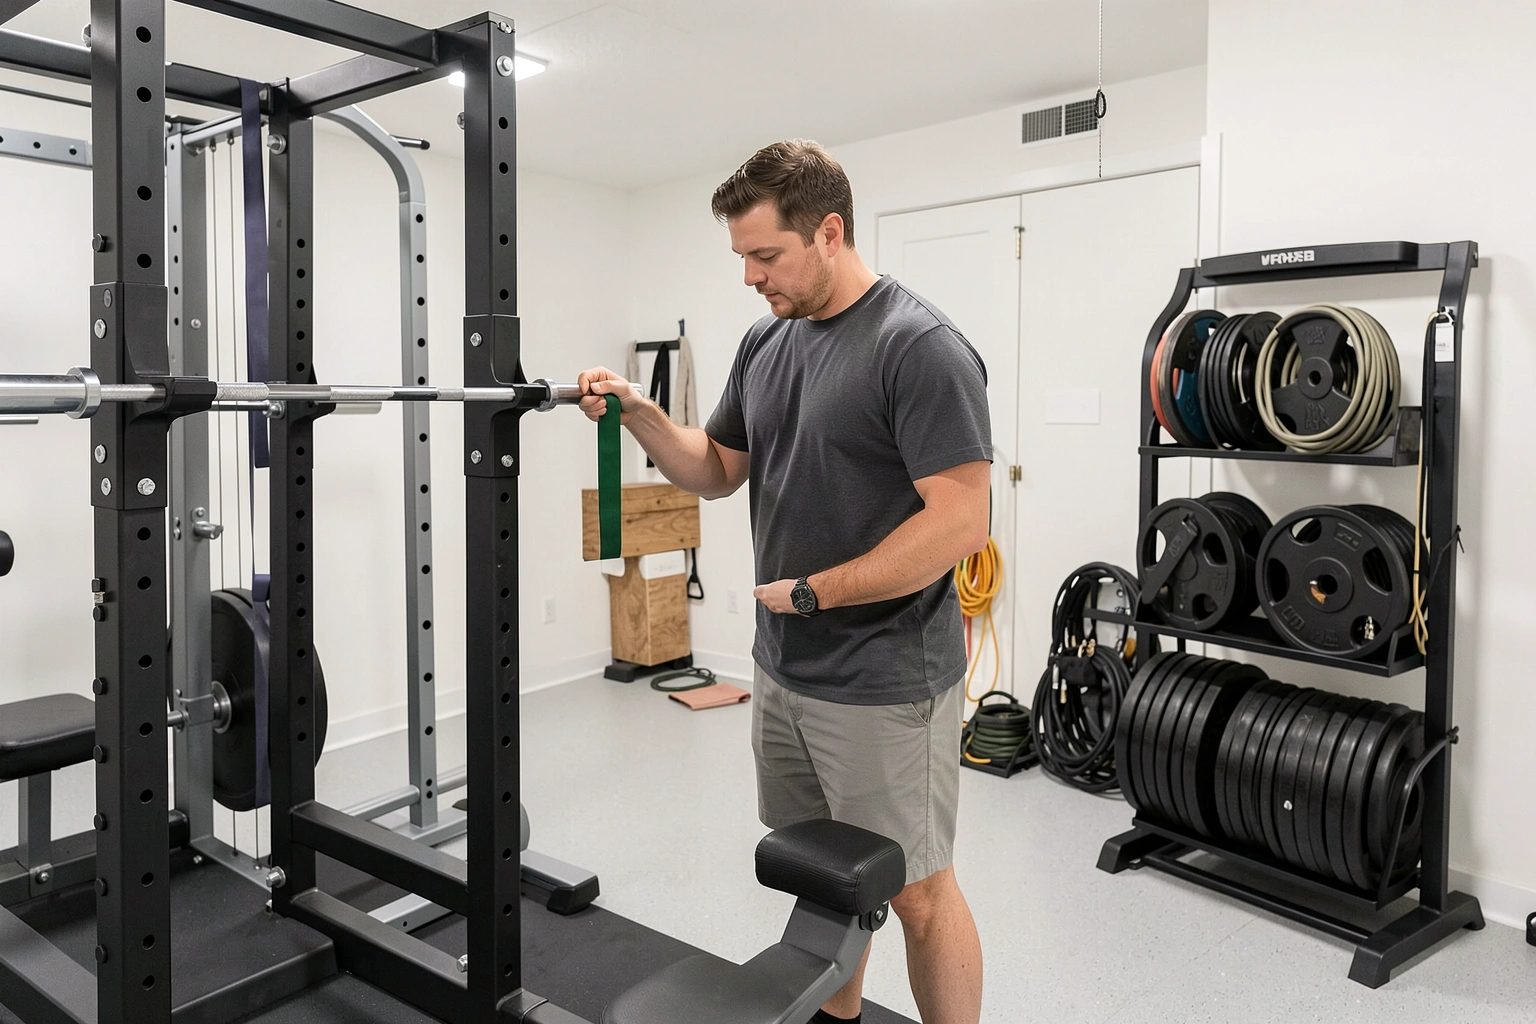
Before each workout, check:
- Equipment: bolts, pins, J-hooks, safety bars or spotter arms, collars, and visible wear points
- Cardio machines: treadmill safety key, belt area, console, and emergency stop function
- Free weights and accessories: dumbbells, plates, bands, handles, and any cracked or damaged items
- Environment: clear floor, dry surface, open walkways, cords out of the way, good lighting, and adequate airflow
After the workout, reset the room. Put plates back in storage, coil cords safely, and return benches or accessories to their place. That habit reduces the chance of the next session starting with a hidden hazard.
On a weekly basis, do a more careful check:
- wipe sweat and moisture from benches, handles, and machine contact points
- inspect flooring for curling edges, gaps, or shifting sections
- look for rust, fraying, cracking, or loose fasteners
- confirm storage racks, shelves, and wall hooks are still secure
- check that walkways are still open and clutter-free
On a monthly basis, do a deeper maintenance pass:
- tighten hardware if the manual allows it
- inspect cables, bands, pulleys, and moving parts more closely
- review the treadmill belt, deck, and safety key function
- check anchors, wall mounts, and floor contact points
- reassess whether the room layout still leaves enough clearance for the equipment you use most
If something changes from one week to the next, treat it as a warning rather than a minor nuisance.
Childproof and Pet-Proof the Home Gym
A home gym shared with children or pets needs barriers, not just reminders. Heavy objects, moving parts, and cords all create hazards at low height where kids and animals naturally move.
Use locked storage for weights, clips, and accessories when possible. Keep medicine balls, kettlebells, and plates out of reach. If the gym is in a common room, close off the room with a door or gate when you are not using it, and keep the entrance locked if that is practical for your setup.
Pets can be especially risky around moving equipment. A dog crossing behind a bench or under a cable path can create a sudden distraction or collision. Keep the workout area closed off during sessions, and avoid leaving bands or cords where they can be chewed or tangled.
Keep small accessories elevated and out of reach. Collars, clips, handles, and resistance bands should not be left on the floor or on low shelves where children or pets can grab them. Mirrors, fans, and heaters should also be placed with care. A fan should not point where it can pull loose items into moving parts, and space heaters should be kept well away from mats, cords, and storage.
Garage Gym vs Basement Gym: Safety Differences to Plan For
A garage gym and a basement gym each have their own risks.
| Space type | Common safety concerns | Best precautions |
|---|---|---|
| Garage gym | Temperature swings, dust, moisture, vehicle traffic, rough floors | Use stable flooring, manage humidity, keep equipment away from vehicle paths, check for rust and dust buildup |
| Basement gym | Lower ceilings, limited ventilation, moisture, potential flooding, dim lighting | Watch overhead clearance, add airflow and lighting, control dampness, keep equipment off vulnerable floor areas |
Garages often give you more open space, but they can be harder on equipment and comfort. Heat, cold, and dust all affect how safe and pleasant the room feels. Basements are often more climate-stable, but the lower ceiling and higher moisture risk can create other problems. If a basement has a history of dampness, that should be addressed before adding flooring or expensive equipment.
For both spaces, the same basic rule applies: choose a setup that matches the room’s weakest point, not just its square footage.
When to Consult a Professional
Some safety jobs are reasonable to do yourself. Others are not.
Bring in a professional if you need:
- electrical upgrades, new outlets, or GFCI protection installed
- structural anchoring into walls, ceilings, or floors you are unsure about
- help leveling a floor that is significantly uneven
- guidance on mounting heavy equipment to unknown surfaces
- inspection of a damp basement, water intrusion, or mold concerns
- assembly or installation that exceeds the manufacturer’s clear DIY instructions
If a piece of equipment feels unstable after assembly, or if the installation depends on guessing about load-bearing capacity, stop and get qualified help. That is especially true for anything overhead, wall-mounted, or heavy enough to injure someone if it fails.
A safe home gym is built on boring details done well: stable flooring, enough space, secure storage, good light, proper airflow, and routine checks. Those choices are not flashy, but they are what keep the room useful over time.