
How to Create an Efficient Home Gym

An efficient home gym is not the one with the most equipment. It is the one that fits your space, supports your training goals, and stays easy to use week after week. That means making a few smart decisions up front: what kind of workouts you will actually do, how much room you can dedicate, and which pieces of equipment deliver the most variety without creating clutter.
For a homeowner, renter, or apartment dweller, the goal is usually the same: build a compact setup that supports consistent training without wasting money or floor space. That can be a strength-focused corner of a garage, a spare room that doubles as storage, or a simple apartment setup built around a few versatile tools.
Start With Your Fitness Goals and Workout Style
Before buying anything, define what the gym needs to support. A home gym built for strength training looks different from one meant mainly for cardio, mobility, or general fitness.
A strength-focused setup usually prioritizes resistance training tools such as adjustable dumbbells, a bench, a barbell, and eventually a rack. A cardio-focused setup may lean toward a treadmill, bike, rower, or jump rope. A hybrid setup blends both, but that only works well if you keep the equipment list tight.
A practical way to decide is to ask which workouts you will repeat most often over the next six months. If your routine is mostly squats, presses, rows, and accessory work, strength gear should come first. If you prefer short conditioning sessions and bodyweight work, you can build around mats, bands, and a compact cardio option. If you want both, choose equipment that overlaps across categories rather than buying separate machines for everything.
A sharper decision framework
If you are unsure what to build first, use this quick filter:
- Choose strength-first if you want to get stronger, use progressive overload, or train major lifts regularly.
- Choose cardio-first if your main goal is conditioning, calorie-burning sessions, or low-impact movement you will do often.
- Choose hybrid if you want strength training and conditioning, but only if you can keep the setup compact and avoid duplicating equipment.
A good rule of thumb is this:
– If you lift 3 or more times per week, start with strength tools.
– If you mainly want daily movement or short workouts, start with cardio or bodyweight basics.
– If you are building a shared-use room or very small space, start with the tools that support the most exercises per square foot.
A simple goal-based rule
- General fitness: bands, dumbbells, bench, floor space
- Strength training: dumbbells, barbell, plates, rack, bench
- Cardio plus mobility: compact cardio machine, mat, bands, storage for small accessories
- Hybrid training: a few strength tools plus one cardio piece, not two or three
This goal-first approach prevents the most common mistake: buying equipment because it looks useful instead of because it matches your actual training.
Measure Your Space and Set Realistic Limits
A home gym should be designed around usable space, not just the room’s total square footage. Measure the area where you can actually train, including ceiling height, door swing, and clearance around each piece of equipment.

For example, a spare bedroom may have enough floor space for a bench and dumbbells, but not enough room for a rack plus barbell work unless you leave open movement zones. An apartment corner may fit a foldable bench and storage rack, but not a treadmill that dominates the room.
Pay attention to three things:
- Floor space you can keep open
- Ceiling height for overhead work or pull-up bars
- Clearance around equipment for safe movement
A rack, bench, or cardio machine should not block doors, closets, or walkways. If you need to move furniture every time you train, the gym is less likely to get used consistently.
[IMAGE_1_PLACEHOLDER]
If you are unsure whether a machine or rack will fit, check the manufacturer’s documentation before buying. Clearance, assembly, anchoring, and electrical needs can vary by product, and those details matter more than a product photo.
Room type matters
- Garage gym: best for larger equipment, racks, plates, and noise-tolerant training
- Spare room gym: best for compact strength work and functional training
- Apartment gym: best for low-noise, space-saving equipment that stores easily
If the space is shared with another use, plan for a setup that can be reset quickly. That usually means fewer large items and more vertical storage.
Choose the Most Versatile Equipment First
The most efficient home gyms rely on equipment that supports many exercises. That usually means choosing tools that can be loaded, adjusted, folded, or stored easily.
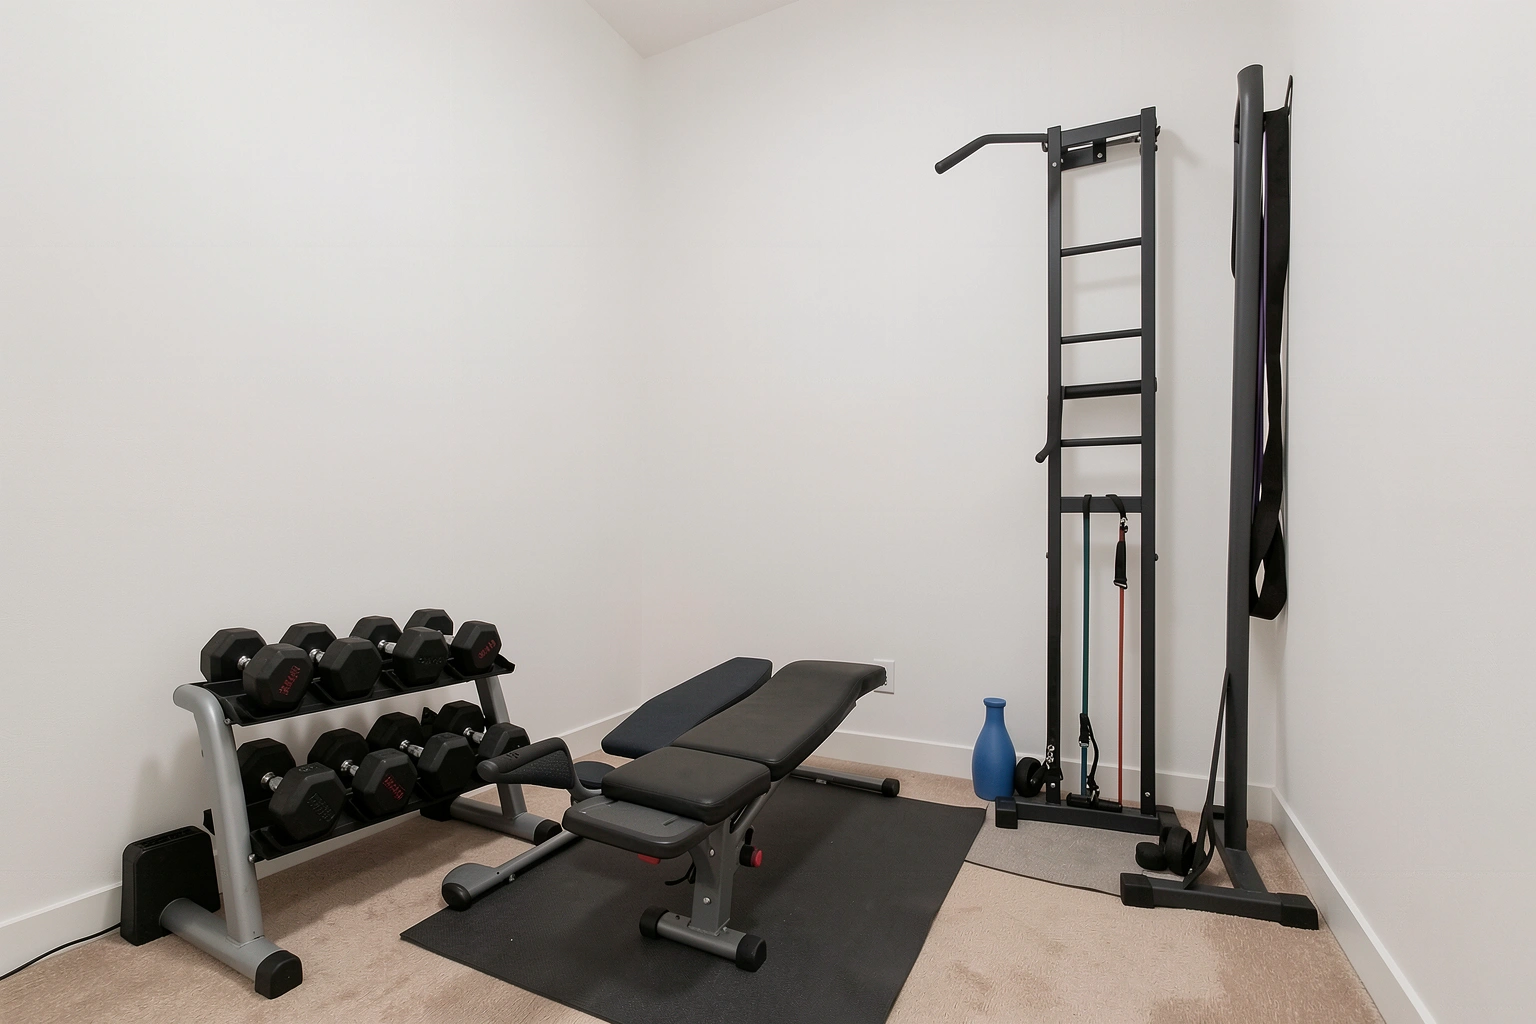
Here is a practical comparison of common options:
| Equipment | Space Use | Versatility | Best Use Case | Trade-Off |
|---|---|---|---|---|
| Adjustable dumbbells | Low | High | General strength training in small spaces | Higher upfront cost than a basic pair, but far less clutter than fixed dumbbells |
| Resistance bands | Very low | High | Warm-ups, accessory work, travel-friendly training | Limited loading compared with heavier free weights |
| Kettlebells | Low to moderate | High | Swings, carries, presses, conditioning | You may need more than one weight to cover all movements |
| Adjustable bench | Moderate | High | Pressing, rows, split squats, step-ups | Takes more room than floor-only training |
| Barbell and weight plates | Moderate to high | Very high | Progressive overload for major lifts | Needs more space, storage, and floor protection |
| Power rack | High | Very high | Safer squats, presses, pull-up work | Excellent for training variety, but not ideal in tiny spaces |
| Pull-up bar | Very low | Moderate to high | Upper-body pulling and bodyweight work | Ceiling height and mounting method matter |
| Compact cardio equipment | Moderate to high | Moderate | Conditioning and recovery | Can consume a lot of space if chosen too early |
For most people, the first purchases should follow this order:
-
Floor protection and storage basics
Start with mats, a clear workout zone, and a simple place to keep accessories. This makes the space usable immediately and prevents clutter from building up. -
One primary training tool
Choose adjustable dumbbells for most small spaces, or a pair of dumbbells/kettlebell if you are on a tighter budget. Add resistance bands early because they are inexpensive, compact, and useful for warm-ups and accessory work. -
A bench if your room allows it
A bench expands pressing, rowing, split squat, and step-up work. If you cannot fit a bench comfortably, stay with floor-based work until you can. -
A barbell, plates, and rack if strength is the main goal and space allows it
This is the best next step for people who want serious progressive overload. It should come after the basics, not before them.
If you have more room and want to build a stronger setup over time, a barbell, plates, and rack become the next logical step. Those tools support progressive overload better than most compact options, but they only make sense if you have the space and commitment to use them regularly.
Ranked buying sequence by scenario
Ultra-budget setup
1. Resistance bands
2. One pair of dumbbells or a kettlebell
3. Floor mat or basic flooring
4. Bench only if you still have room in the budget
This setup can realistically support full-body strength work, mobility, warm-ups, and light conditioning. It is best for beginners, renters, and anyone who wants the lowest-cost starting point.
Small-space setup
1. Adjustable dumbbells
2. Resistance bands
3. Foldable or compact bench
4. Vertical storage or wall hooks
5. Optional pull-up bar if the space allows it
This setup can realistically support most pressing, rowing, leg, and accessory work. It works especially well in apartments, spare rooms, and narrow rooms where every item must earn its place.
Strength-focused home gym
1. Flooring and storage
2. Adjustable bench
3. Barbell and plates
4. Power rack
5. Pull-up bar or rack attachment
6. Optional cardio piece only after the lifting base is complete
This setup can realistically support squats, presses, pulls, deadlift variations, and progressive overload over time. It is best when the room is dedicated to training and you have enough space for safe bar path and loading.
Adjustable dumbbells vs. fixed dumbbells
Adjustable dumbbells are usually the better fit for compact home gyms because they replace an entire rack of fixed weights. Fixed dumbbells are simpler and quicker to grab, but they consume more space and are harder to justify in a small room unless you already know you will use them heavily.
Free weights vs. machines
Free weights generally offer more movement variety per square foot. Machines can be useful, but they often take up more room and serve fewer training purposes. For a home gym where space is limited, free weights and bodyweight tools usually deliver better value.
Build a Smart Layout for Safety and Convenience
A good layout makes the gym feel easy to use. The fewer obstacles between you and the workout, the more likely you are to stay consistent.
Think in zones:
- Main lifting zone: bench, dumbbells, barbell, or rack
- Movement zone: open floor for warm-ups, mobility, and bodyweight work
- Storage zone: shelves, hooks, or a rack for accessories
- Cardio zone: if you have a machine, place it where it does not block lifting space
The best layout keeps the heaviest or most-used equipment closest to where you naturally enter the room. That reduces setup time and makes the space feel organized. In a garage gym, a rack along one wall with flooring in front of it is often more efficient than placing equipment in the center of the room. In a spare bedroom, one wall can hold storage while the center stays open for training.
Vertical storage is one of the easiest ways to save space. Wall hooks, shelves, and compact storage racks keep bands, collars, mats, and smaller accessories off the floor. That matters because clutter is not just an appearance issue; it creates trip hazards and makes workouts feel like a chore.
[IMAGE_2_PLACEHOLDER]
For mounted equipment such as pull-up bars, wall brackets, or racks, follow the manufacturer’s instructions carefully. If anchoring is required, use the correct hardware and surface type. A secure setup is worth more than a slightly cleaner look.
Concrete layout examples
Apartment corner layout: about 6 x 8 feet
– Place a foldable bench along the longest wall.
– Store adjustable dumbbells under or beside the bench.
– Mount or hang resistance bands on a wall hook or inside a closet door.
– Keep a mat rolled against the wall for floor work.
– Leave the center open so you can press, row, split squat, and stretch without moving furniture.
This kind of layout supports strength training, mobility, and light conditioning in a very small footprint. It is best when the gym must share space with everyday living.
Garage layout: about 8 x 10 feet or larger
– Put a power rack on one wall or in a back corner.
– Place a barbell and plates nearby for easy loading.
– Use rubber flooring in the lifting area.
– Keep a bench close to the rack for pressing and accessory work.
– Store bands, collars, and smaller items on wall hooks or a shelf.
This layout supports heavy lifting more comfortably and gives you a clear path for squats, presses, and deadlifts. It is a stronger fit for a dedicated training area than for a shared room.
Set a Budget and Prioritize Purchases in Phases
A phased build is often the most practical way to create an efficient home gym. Instead of trying to buy everything at once, build the space in order of usefulness.
A simple priority order looks like this:
- Training basics: floor protection, one or two versatile tools
- Core strength equipment: dumbbells, bench, bands, or kettlebell
- Storage and layout improvements: racks, hooks, shelves
- Major strength upgrades: barbell, plates, power rack
- Cardio additions: only after the strength base is covered
This approach helps you avoid overspending on equipment that looks impressive but does not improve your workouts much. It also gives you time to learn what you actually use. Many people discover that a small set of tools covers most of their training needs.
A phased plan can also reduce buyer’s remorse. If you begin with bands and adjustable dumbbells, you can train immediately while deciding whether a bench, rack, or cardio machine is worth adding later. That is usually more efficient than filling a room with gear before you know how you train.
Home gym budget framework
- Low budget: focus on bands, one set of dumbbells or a kettlebell, and a mat
- Moderate budget: add adjustable dumbbells, a bench, and better storage
- Higher budget: build toward a barbell, plates, rack, flooring, and only then cardio
If your budget is limited, buy in the order of how often you will use each item, not how impressive it looks. A bench you use every week is a better first purchase than a machine you use occasionally.
Cover the Basics: Flooring, Lighting, Ventilation, and Noise
The essentials around the equipment matter almost as much as the equipment itself.
Flooring
Flooring protects both the room and the gear. Rubber mats, interlocking foam, or dedicated gym flooring can reduce slipping, absorb some impact, and make the space feel more finished. If you plan to use heavy weights, choose flooring that can handle the load and won’t shift underfoot.
For apartment or shared-wall settings, flooring also helps reduce vibration and noise. That matters when lifting, dropping light weights, or using a cardio machine that can transmit movement through the floor.
Lighting
A dim room makes workouts feel less inviting and can make it harder to check form, read settings, or move safely. Bright, even lighting is usually enough. If the room has a single weak overhead fixture, adding a second light source can make the space much more usable.
Ventilation
A garage gym or small enclosed room can heat up quickly. Good airflow makes longer sessions more comfortable and helps the room stay usable year-round. If the space has limited windows or stale air, a fan can make a noticeable difference.
Noise
Noise is a major factor in apartments and shared homes. Rubber flooring, controlled movement, and compact equipment all help. If you are considering a treadmill, rower, or heavy free-weight setup in a shared building, check how much vibration and sound the space can reasonably handle before committing.
Use Simple Equipment Combinations to Maximize Workout Variety
An efficient home gym does not need many separate machines. It needs combinations that cover major movement patterns: push, pull, squat, hinge, carry, and core work.
Here are a few strong combinations:
Adjustable dumbbells + bench + bands
This is one of the most space-efficient setups for general fitness and strength training. It supports presses, rows, split squats, shoulder work, curls, triceps work, and band-assisted mobility. It is especially useful in apartments or spare rooms.
What it can realistically support:
Full-body strength training, beginner to intermediate progressive overload, warm-ups, accessory work, and short conditioning circuits.
Barbell + plates + rack + bench
This is the most complete strength-focused setup on the list. It supports progressive overload well and gives you room to grow. The trade-off is space, cost, and the need for proper flooring and storage.
What it can realistically support:
Squats, bench press, overhead press, deadlift variations, pull-ups, and long-term strength progression.
Kettlebell + bands + pull-up bar
This is a compact functional training setup that works well when floor space is limited. It is especially useful for conditioning, carries, swings, and bodyweight work. The limitation is that it may not replace heavier strength loading for every goal.
What it can realistically support:
Conditioning, core work, grip work, upper-body pulling, and lighter full-body sessions.
Compact cardio machine + bands + mat
This works well for people whose main priority is conditioning, mobility, and general health. It is less ideal if strength training is a major goal, because the setup can become too cardio-heavy and not versatile enough.
What it can realistically support:
Low-impact conditioning, warm-ups, recovery sessions, mobility work, and simple bodyweight training.
The key is not to collect equipment from every category. It is to choose a few tools that overlap well and leave room for progression.
Avoid the Most Common Home Gym Mistakes
The biggest waste in home gym planning usually comes from buying too much too early.
Common mistakes include:
- Choosing single-purpose machines before covering basics
- Ignoring storage and letting the room become cluttered
- Underestimating how much open floor space you need
- Skipping flooring and damaging the room
- Buying cardio equipment that crowds out strength work
- Filling the room with gear that is hard to reset after a workout
Another common problem is overbuilding for a future routine that never arrives. A large rack or bulky machine may seem like a smart investment, but if it makes the room harder to use, it can reduce consistency instead of improving it.
A better test is simple: if a piece of equipment makes the room less convenient to enter, train in, or clean up, it may not be efficient enough for your space.
Keep the Gym Organized and Easy to Use Every Day
An efficient gym is easy to reset. That matters because a tidy room is more likely to stay in use.
A few habits make a big difference:
- Store each item in the same place every time
- Keep frequently used tools within arm’s reach
- Use wall storage or shelves for small accessories
- Leave one area open so the room never feels crowded
- Reset the space immediately after training instead of later
A simple rule works well: if an item is used every session, it should be easy to grab. If it is used occasionally, it can live in a less accessible spot. That keeps the most important tools visible and reduces time spent searching for gear.
For a practical maintenance routine, set aside a few minutes after each workout to put plates, dumbbells, bands, and mats back in place. Once a week, check that flooring is flat, storage is clear, and any mounted equipment is still secure. That small reset helps the gym stay usable without turning cleanup into a separate chore.
This is especially helpful in rooms that serve more than one purpose. The faster the gym can return to normal use, the more realistic it is to maintain long term.
Sample Home Gym Setups for Different Spaces and Budgets
Small apartment setup
A practical apartment gym might include adjustable dumbbells, resistance bands, a foldable bench, a mat, and a doorframe pull-up bar if the door and frame are suitable.
Approximate space need: about 6 x 8 feet, with a nearby closet or corner for storage.
Placement: bench against one wall, dumbbells tucked under the bench or beside it, bands hung vertically, mat rolled or laid flat when in use.
What it can realistically support:
Full-body strength training, mobility work, bodyweight exercises, and light conditioning without taking over the room.
Narrow spare room setup
A spare room can hold a bench on one wall, a storage shelf for accessories, and open floor space in the center.
Approximate space need: about 7 x 9 feet or similar.
Placement: shelf and hooks on one wall, bench stored lengthwise along the opposite wall, open center for training.
What it can realistically support:
Dumbbell work, split squats, rows, presses, core work, and quick warm-ups while still leaving the room usable for other purposes.
Garage gym starter plan
A garage gym often starts with flooring mats, a power rack, a barbell, weight plates, and a storage rack.
Approximate space need: about 8 x 10 feet for a basic lifting zone, with more room improving comfort and safety.
Placement: rack on one wall or in a back corner, plates stored close to the rack, bench nearby, open floor in front of the rack for lifting and movement.
What it can realistically support:
Squats, bench press, overhead press, deadlift work, pull-ups, and a long-term strength-focused routine.
Budget-first phased build
A phased build might begin with resistance bands and adjustable dumbbells, then add a bench, then storage, then a rack or barbell setup later.
Approximate space need: flexible, often as little as a room corner or a small open wall.
Placement: keep the first purchases in one dedicated zone so the setup stays easy to reset.
What it can realistically support:
Beginner to intermediate strength training, warm-ups, accessory work, and a simple routine that can grow over time.
When to Consult a Professional
Some home gym decisions are straightforward, but a few deserve expert help. Consult a professional if you need:
- A rack or pull-up bar mounted to a wall or ceiling
- Electrical work for a machine or dedicated outlet
- Help evaluating floor load, especially in an apartment or upstairs room
- Advice on anchoring heavy equipment safely
- Guidance on flooring or installation for a larger setup
If the equipment is heavy, mounted, or powered, a careful installation is part of making the gym efficient. A secure setup is safer, quieter, and more likely to last.
Final Takeaway
The most efficient home gym is built around a clear purpose, a measured space, and a short list of versatile equipment. If you choose tools that match your workouts, keep the layout simple, and build in phases, you can create a compact setup that supports real training without crowding your home or draining your budget.
Final decision rule: if you are still unsure what to buy, start with the smallest setup that lets you train consistently for the next 3 months. Choose strength-first if you lift regularly, cardio-first if conditioning is your main goal, and hybrid only if you can keep the equipment list short and the floor plan open.