
How to Create a Home Gym in Any Room

A home gym does not need to be a perfect spare room or a large finished basement. It needs a clear purpose, a workable layout, and equipment that fits the space you actually have. That might be a bedroom corner, a garage bay, a basement section, or an unused dining room.
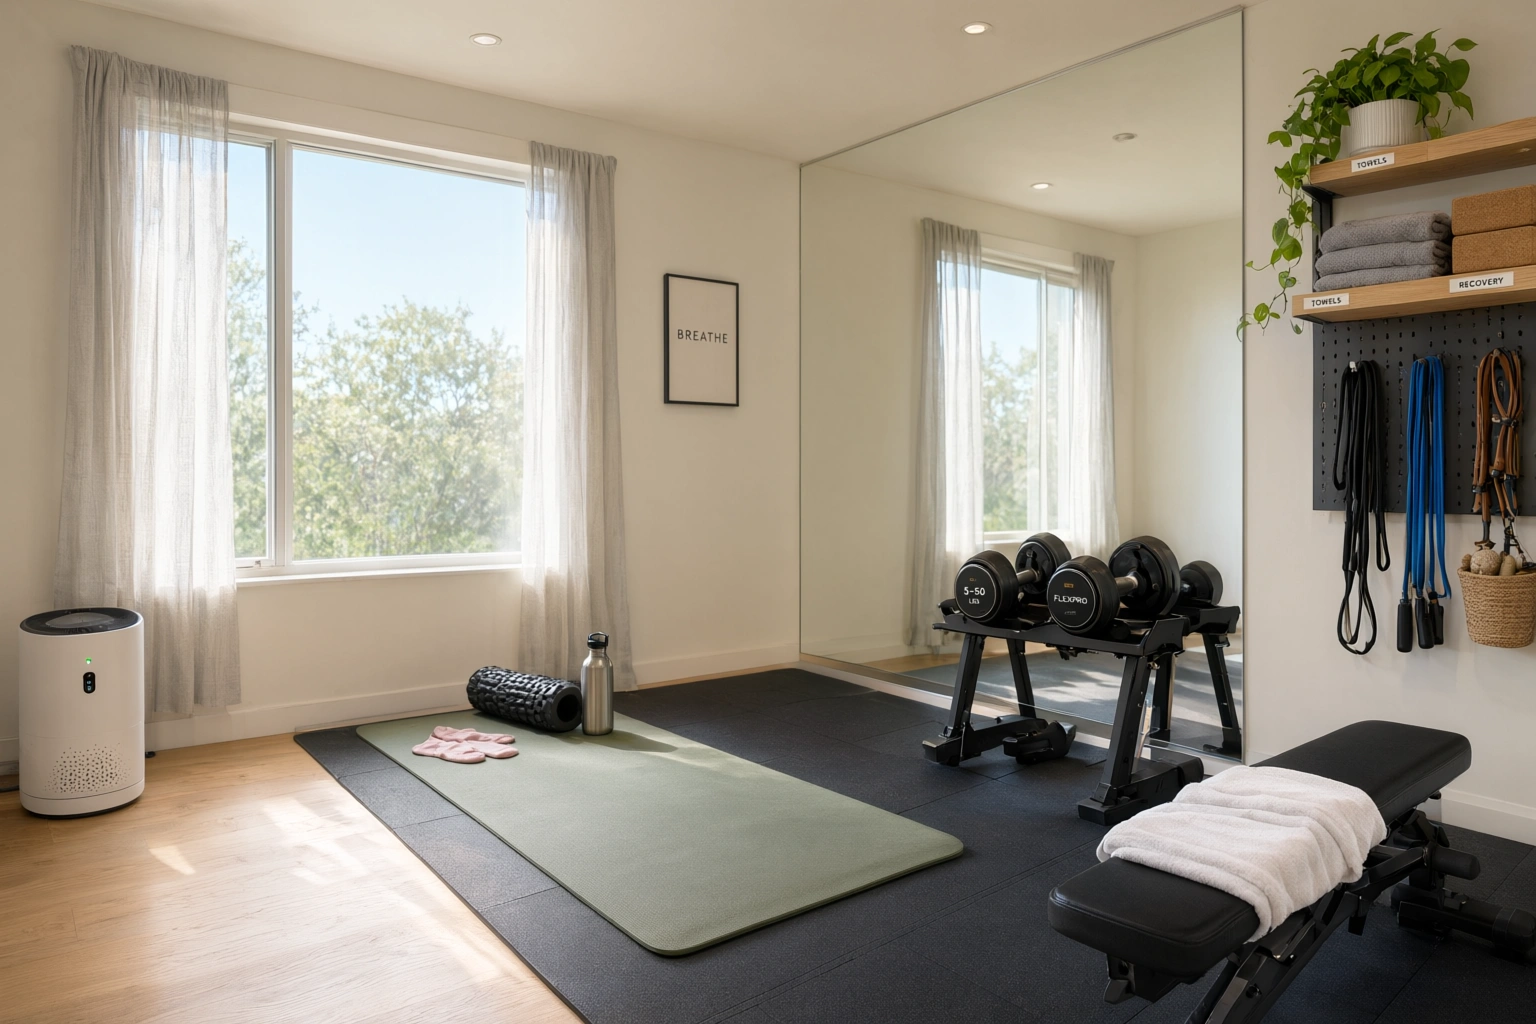
The most reliable way to build one is to plan around movement first and equipment second. If you define your training goal, measure the room honestly, and choose the few items that support that goal, you can create a setup that is practical, safe, and easy to maintain.
Start With Your Goal and Available Space
Before buying anything, decide what the room needs to support. A gym for strength training looks very different from one built for yoga, walking, or general fitness. If you try to cover every type of workout in a small room, the space usually becomes crowded and inconvenient.
A useful first step is to write down your primary goal:
- Strength training: dumbbells, bench, rack, barbell setup, or kettlebells
- Cardio: bike, rower, treadmill, or open floor for intervals
- General fitness: adjustable weights, bands, mat work, and one compact cardio option
- Mobility and recovery: mat, mirror, bands, foam roller, and open floor space
Then measure the room in a way that reflects real use, not just the outer dimensions. Note the usable floor area, ceiling height, door swing, closet depth, and any low beams, vents, or sloped ceilings. A room that looks large enough on paper can feel tight once a bench, rack, or cardio machine is inside it.
A simple rule of thumb: if the room is under about 6×8 feet, keep it to one primary training style and compact gear. A bedroom corner can usually handle a mat, bands, adjustable dumbbells, and a small storage bin. A 6×8 ft area can work for floor training plus one compact piece of equipment, such as a bike or a foldable bench. A single garage bay can support a more complete garage gym with a rack, bench, and extra storage, as long as you still leave room to move safely.
If you want a visual starting point, a simple inspiration board can help narrow the style of gym you actually need. HGTV’s home gym examples can be used as design ideas, but they are just examples, not a rule for what every room should become.
Choose the Right Room for Your Home Gym
The best room is not always the biggest room. It is the one that matches your workout style, your tolerance for noise, and your ability to make changes.
Bedroom
A bedroom gym works best for low-noise, low-profile training. Think adjustable dumbbells, resistance bands, a yoga mat, and compact storage that can disappear after workouts. This is usually the most renter-friendly option because it can stay temporary. The trade-off is obvious: you get less room for larger machines and less freedom to leave equipment out.
Garage
A garage gives you the most flexibility for larger equipment, heavier lifting, and more permanent flooring. It is often the easiest place for a rack, bench, kettlebells, or a bike. The downside is climate. Garages can be hot, cold, or damp, so comfort and ventilation matter more than they do in a finished room.
Basement
Basements can be excellent home gyms if the space is dry and well ventilated. They often work well for mixed setups: dumbbells, a mirror, a rower, and floor training. The main caution is moisture. If the basement feels damp, address that before bringing in equipment or flooring.
Spare room or unused dining room
A spare room is often the easiest place to build a balanced gym because it already feels separate from the rest of the home. An unused dining room can also work well for a general fitness or yoga-focused setup, especially if you keep the equipment compact and the storage tidy.
Apartment or rental space
If you rent, the room choice is usually about reversibility. A folding mat, adjustable dumbbells, bands, and a rolling storage cart can create a real workout zone without permanent changes. A folding or hanging divider can also separate the gym from the rest of the room if needed, which is a useful option when you cannot close off the area with a door.
For room separation ideas, pocket doors, sliding barn doors, glass walls, or a folding divider can help create a distinct workout area when you do not have a dedicated room.
Plan the Layout Before Buying Equipment
A home gym fails most often when equipment arrives before the layout is decided. Once that happens, the room fills up fast and every workout feels like a setup project.
Map the room in three zones:
- Main workout zone — the area where you lift, stretch, or move
- Equipment zone — where machines or larger items stay parked
- Storage zone — where small accessories live when not in use
Leave a clear path from the door to the workout area. In a small room, this matters more than it sounds. If you have to step around dumbbells, mats, or a bench every time you enter, the room will feel cluttered and unsafe.
A good rule is to place the biggest item first, then build around it. For example:
- In a strength-focused room, place the rack or bench first and keep the floor area open around it
- In a cardio room, center the machine so you can mount and dismount safely
- In a mixed-use room, keep one wall for storage and one open zone for floor work
Also think about what happens when you are not training. If the room doubles as an office, guest room, or bedroom, choose items that can fold, roll, or stack cleanly. A room that must be cleared every day should not depend on heavy, awkward equipment.
If the room has to support two goals at once, such as strength plus cardio, choose one anchor activity and one compact support activity. For example, a pair of adjustable dumbbells plus a bike is usually easier to fit than a rack, treadmill, and bench all at once. In a very small space, the goal is not to do everything; it is to make the two most important workouts easy enough to repeat consistently.
Pick the Minimum Equipment You Need First
The best starter gym is the one you will actually use. That usually means buying the smallest set of equipment that supports your main workouts, then expanding later.
If your goal is strength training
Start with:
– Adjustable dumbbells or a basic set of dumbbells
– A bench if you plan to press, row, or step up
– Resistance bands for warmups and accessory work
– Optional kettlebells if you like swings, carries, or compact conditioning
If space is tight, adjustable dumbbells usually make more sense than a full fixed set. They save floor space and let you cover a wider weight range without buying multiple pairs. Fixed dumbbells are faster to grab during circuits, but they take more room and can make a small gym feel crowded.
If your goal is cardio
Start with one machine or one floor-based cardio plan:
– Stationary bike
– Rowing machine
– Treadmill
– Jump rope or bodyweight intervals if you need the smallest footprint
For apartments and shared homes, quieter options are often more practical. If noise is a concern, a stationary bike or a rowing machine with smoother resistance can be easier to live with than a treadmill, though the best choice still depends on your workout style. If you want to compare machine types, think about how much floor space you can spare, how loud the machine is, and whether you will actually prefer the movement pattern.
If your goal is general fitness
A compact, versatile setup often works best:
– Adjustable dumbbells
– Resistance bands
– Yoga or exercise mat
– One cardio option, if desired
– Storage for small accessories
This is the easiest type of gym to phase in over time. It also works well in rooms that must serve another purpose.
Compare Space-Saving Equipment Options
When space is limited, the right equipment is usually the one that does more than one job.
| Choice | Best for | Space use | Noise | Trade-off |
|---|---|---|---|---|
| Adjustable dumbbells | Strength training in small rooms | Low | Low | Slower to change than fixed dumbbells |
| Fixed dumbbells | Frequent lifting and fast transitions | High | Low | Need more storage and floor space |
| Treadmill | Walking, running, incline work | High | Medium to high | Largest footprint in most homes |
| Stationary bike | Low-impact cardio and apartment use | Medium | Low to medium | Less full-body involvement than rowing |
| Rowing machine | Cardio plus upper- and lower-body work | Medium | Low to medium | Needs a clear pull path and some length |
| Foldable equipment | Multipurpose rooms and rentals | Low when stored | Varies | Usually less robust than dedicated gear |
If you need one machine for a small room, a bike or rower is often easier to live with than a treadmill. A treadmill is useful if running or walking is your main workout, but it usually demands the most space and creates more vibration. A bike is simpler to place in a corner. A rower can be compact enough for many homes, but it needs room to move during use.
For very small rooms, adjustable dumbbells plus a mat are often the best starting point. For rentals, foldable or rolling gear tends to work better than bulky permanent equipment. For mixed-use spaces, choose items that can be stored vertically, tucked under furniture, or moved out of the way quickly.
Dedicated equipment is usually better if the room is permanent and training is serious. Foldable or all-in-one gear makes more sense when the room has to serve multiple purposes.
Protect the Floor and Reduce Noise
Floor protection is not just about appearance. It helps with vibration, impact, and long-term wear on the room.

Rubber flooring is usually the better choice for a serious gym because it tends to handle weight, impact, and repeated use more effectively. Foam tiles can feel softer underfoot and may work for light workouts, stretching, or bodyweight exercise, but they are generally less durable under heavier equipment.
If you are only using a mat-based setup, a quality yoga mat or exercise mat may be enough. For heavier lifting, place the equipment on a more durable surface or use dense mats beneath key items. In a renter-friendly home gym, a simple mat can be enough for bodyweight work, while interlocking tiles or a protective underlayment may make more sense if you need a little extra cushioning without permanent flooring changes.
Noise matters too, especially in apartments and shared homes. Rubber flooring, controlled movement, and quieter equipment can all help. Avoid dropping weights if you can. If you use a treadmill or rower, place it where vibration is less likely to travel through walls or floors.
For renters, a layered approach often works well: a mat under the workout area, a protective pad under the machine, and careful placement away from shared walls. That gives you some protection without making permanent changes.
Set Up Storage, Organization, and Vertical Space
A gym feels usable when every item has a home. Without storage, even a good layout becomes cluttered.
Use vertical and edge space before claiming the center of the room:
- Wall-adjacent racks or shelves for dumbbells, kettlebells, and accessories
- Hooks for resistance bands, jump ropes, or towels
- Rolling carts for small items that need to move out of the way
- Under-bed storage for bands, mats, sliders, and smaller accessories in a bedroom setup
- Bar cart or compact utility cart as a hydration station and accessory holder
Keep frequently used items visible and easy to reach. Put less-used items higher or farther away. If a piece of equipment is annoying to access, it will probably end up on the floor.
A storage system should also match the room’s purpose. In a strength room, organize around dumbbells, plates, and a bench. In a yoga or general fitness room, prioritize open floor space and quick-access storage for mats and bands.
Make the Room Comfortable and Safe to Use
A gym that feels uncomfortable will not get used regularly.
Lighting
Bright, even lighting helps you see your form and makes the room feel less cramped. If the room is dark, add lighting before you add more equipment. A mirror can also improve how the space feels and help with form checks.
Mirrors
A full-length mirror is useful in a home gym for more than appearance. It helps with alignment during lifting, stretching, and bodyweight work. If you mount one, make sure it is secure and placed where it will not be bumped by equipment.
Ventilation
Airflow matters in any workout space, especially in basements, garages, and small bedrooms. Fans, windows, and dehumidification where needed can make the room more comfortable. If the room gets stuffy quickly, your workouts will feel harder than they need to.
Safety
Keep the floor clear of loose items. Make sure racks, mirrors, and wall-mounted storage are installed securely. Leave enough room to step on and off equipment without twisting around obstacles. In a small room, safety is often a layout problem, not an equipment problem.
Adapt the Setup for Bedrooms, Garages, Basements, and Renters
Each room type comes with its own limits.
Bedroom gym
Best for:
– Adjustable dumbbells
– Bands
– Mat work
– Compact storage
Keep the footprint small and avoid anything that dominates the room visually or physically. A bedroom gym should be easy to tidy at the end of a session.
Garage gym
Best for:
– Rubber flooring
– Bench
– Kettlebells
– Rack or half-rack if the space allows
The garage is often the best place for heavier training, but comfort depends on climate control and moisture management. If the floor is concrete, flooring becomes more important.
Basement gym
Best for:
– Mixed-use setups
– Cardio machines
– Dumbbells
– Mirror and storage
Basements often offer the best blend of privacy and space, but they need attention to airflow and humidity. If the room feels damp, address that before investing in flooring or upholstered equipment.
Renter-friendly setup
Best for:
– Portable mats
– Adjustable dumbbells
– Resistance bands
– Foldable bench or compact storage cart
For renters, focus on non-permanent solutions: interlocking foam tiles or a thick exercise mat for the floor, freestanding mirrors instead of wall-mounted ones, over-the-door hooks or tension rods instead of drilled storage, and rolling carts or shelving that does not need to be anchored. If you need wall coverage, use removable options that are designed to come down cleanly, and avoid anything that could peel paint or leave permanent marks.
Before making changes, check your lease and confirm what is allowed. Some rentals restrict drilling, adhesive mounts, heavy loads on walls, or floor modifications, so it is better to verify first than repair later.
Budget Your Home Gym in Phases
A phased setup is usually smarter than buying everything at once. It prevents overspending and helps you learn what you actually use.
Here is a simple way to think about budget tiers:
- Starter tier: a mat, bands, and one primary tool such as adjustable dumbbells or a basic cardio option
- Mid-range tier: the starter setup plus a bench, better storage, and improved flooring or a mirror
- More complete home gym: a fuller strength or cardio setup with a rack, heavier flooring, more storage, and possibly a second machine
The exact cost will depend on the brands and equipment you choose, so it is better to budget by category than to assume one fixed number. A practical way to phase the spending is to buy the core workout items first, then add flooring and storage, then expand only if the room still feels open.
Phase 1: Build the core
Choose the equipment that supports your main workouts immediately. For most people, that means a mat, bands, and either dumbbells or one cardio machine.
Phase 2: Improve the room
Add flooring, storage, mirror, or better lighting once the core setup is working.
Phase 3: Expand carefully
Add a bench, rack, or second machine only if the room still feels open and the equipment matches your routine.
This approach is especially useful if you are deciding between strength and cardio gear. It is better to have a small, functional gym than a crowded room with several expensive items you rarely use.
Avoid the Most Common Home Gym Mistakes
The most common mistakes are predictable:
- Buying equipment before measuring the room
- Choosing machines that are too large for the space
- Skipping storage and letting the room become cluttered
- Ignoring floor protection and noise
- Filling the room with too many workout types
- Making permanent changes in a rental without checking restrictions
- Forgetting ventilation and lighting
Most of these problems are avoidable if you plan the room first and buy in stages.
When to Consult a Professional
Some setups are simple enough to handle on your own. Others benefit from professional help.
Consider a professional if you need:
– Electrical work for equipment placement or lighting
– Structural advice for wall-mounted items, racks, or mirrors
– Moisture or ventilation fixes in a basement or garage
– Floor installation for heavy equipment
– Help with a rental space where you need to stay within lease rules
For heavy racks, mounted mirrors, or anything that will carry significant load, follow the manufacturer’s installation instructions and load ratings carefully. If you are unsure, get qualified help rather than guessing.
Final Home Gym Checklist
Before you start training, confirm the room has:
- A clear fitness goal
- Measured floor space and ceiling height
- Equipment matched to that goal
- Enough open area for movement
- Floor protection appropriate for the workout style
- Storage for small items and accessories
- Good lighting
- Reasonable ventilation
- A plan for noise control
- Safe placement of mirrors, racks, and machines
- A setup that fits your lease or long-term plans
The best home gym is not the one with the most equipment. It is the one that fits the room, supports your routine, and stays easy to use week after week.