
How to Convert a Room Into a Home Gym

Turning a spare room, basement, garage, or bedroom into a home gym is mostly a planning project. The room does not need to be large or custom-built. It needs to match your workout style, fit your equipment safely, and stay usable over time.
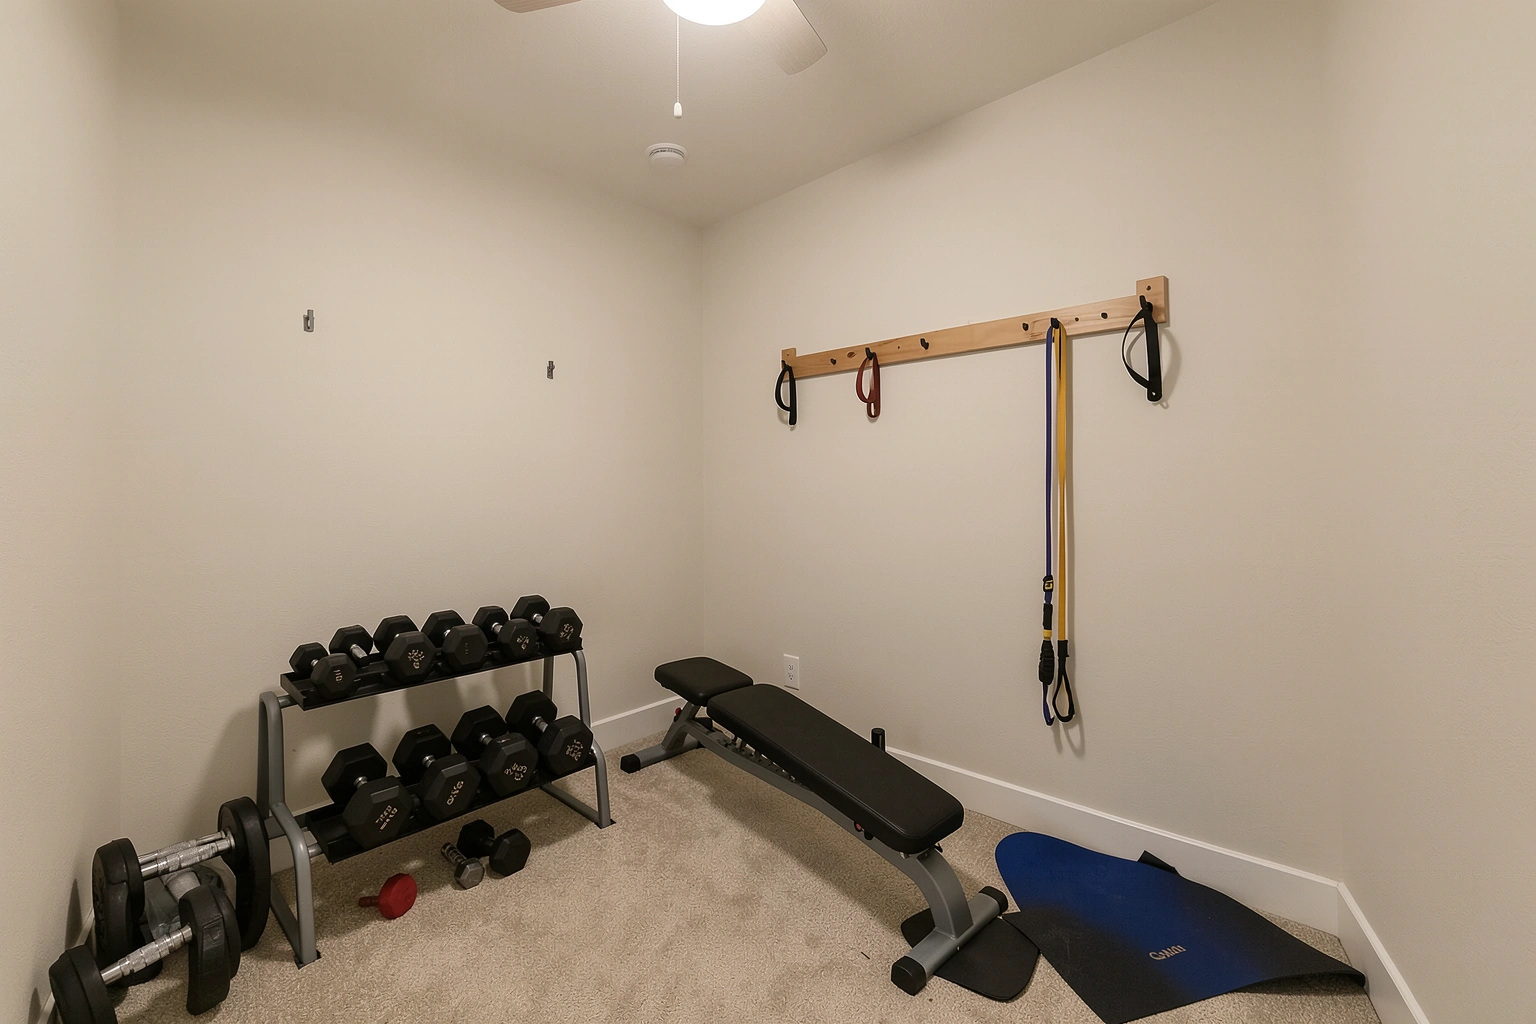
The biggest mistake is buying gear first and figuring out the room later. A better approach is to choose the room, measure it, decide what kind of training it will support, and then build around that. That sequence helps you avoid overcrowding, unnecessary spending, and safety problems.
Start With the Right Room and Workout Goal
The best room is not always the biggest room. It is the room that can support the exercises you actually plan to do.
A bedroom works well for compact setups: dumbbells, resistance bands, a yoga mat, and a foldable bench. It is usually the easiest option for renters because it can stay multi-purpose. The trade-off is limited floor space and less tolerance for noise.
A basement often gives you the most flexibility. It can handle a mixed setup with strength equipment, a bike, a mirror, and storage shelves. Depending on moisture, temperature, ceiling height, and sound transfer, it may need more preparation than other rooms.
A garage is often the best match for larger equipment or a cardio-plus-strength setup. You may have more open floor area and easier access for moving equipment in and out. On the other hand, garages can be harder to keep warm or cool, and they may transmit more noise.
A spare room is usually the cleanest option if you want a dedicated gym without major changes. It can work for strength, mobility, or light cardio, depending on the room size and ceiling height.
Before deciding, match the room to your main workout style:
- Strength-focused: prioritize floor protection, clearance, and storage for weights
- Cardio-focused: prioritize open space, ventilation, and electrical access
- Mobility or yoga-focused: prioritize a clear floor, softer surface, and calm lighting
- Mixed-use: prioritize flexibility and equipment that can be stored away
If the room has low ceilings, overhead presses, pull-up movements, or tall cardio machines may feel cramped. If the room has moisture issues, a basement gym may need more preparation than a bedroom. If noise is a concern, a garage or basement may be easier to manage than a room directly above a living area.
Measure the Space and Plan the Layout
Before you buy anything, measure the room’s length, width, ceiling height, door swing, window locations, and outlet placement. Then sketch a simple layout on paper or use painter’s tape on the floor to outline where each item will go.
This matters because equipment needs more room than its footprint suggests. A bench needs space to move around it. A treadmill needs safe entry, exit, and side clearance. Dumbbells need a landing zone so they are not left in a walkway. Even a yoga mat needs enough open area to stretch your arms and legs without hitting walls or furniture.
A practical layout usually works best in zones:
- Movement zone: open floor for warmups, stretching, or bodyweight work
- Equipment zone: dumbbells, bench, bike, treadmill, or rack
- Storage zone: shelves, wall hooks, baskets, or a cabinet
- Recovery zone: mat, foam roller, or mobility tools if you use them
For small rooms, keep the center open and push storage to one wall. In larger rooms, separate cardio and strength areas so the space feels organized instead of crowded.
A useful rule: if you cannot walk through the room without stepping around equipment, the layout is too full. Leave enough room to move safely while carrying weights, stepping on and off a bench, or using a treadmill without brushing walls or shelves.
Approximate room-size guidance can help turn that into a real plan:
- Minimal setup: about 30 to 50 square feet for one person using a mat, bands, and a few dumbbells
- Moderate setup: about 80 to 120 square feet for a bench, dumbbells, and one compact cardio machine
- Dedicated setup: about 150 square feet or more if you want separate strength, cardio, and storage zones
Sample layout examples:
- 6 x 8 ft corner setup: best for a yoga mat, adjustable dumbbells, resistance bands, and a foldable bench that stores against the wall
- 8 x 10 ft small room: enough for a bench in the center, dumbbells on one wall, and a narrow storage shelf or mirror on another wall
- 10 x 12 ft spare room: can usually fit a bench, dumbbells, a bike or compact cardio machine, and a clear movement lane
- Dedicated room with 150+ sq ft: allows separate zones for lifting, cardio, and storage with better clearance between pieces of equipment
Set a Realistic Budget Before Buying Anything
A home gym can be built in stages. That is often the smartest way to do it.
Think in three tiers:
Budget setup
A basic conversion often runs about $150 to $600, depending on what you already own. That might cover a yoga mat, a few resistance bands, adjustable dumbbells or a small dumbbell pair, a simple storage bin or shelf, and a removable floor mat or foam tiles.
Mid-range setup
A more complete room conversion often lands around $600 to $2,000. That range can cover rubber gym flooring, a foldable bench, adjustable dumbbells, a mirror, wall or freestanding storage, and one cardio machine such as an exercise bike or compact rower.
Premium setup
A more fully built-out room can reach $2,000 to $5,000 or more. That may include higher-quality rubber flooring, larger storage, better lighting, multiple training zones, mirrors, and more than one machine. Costs rise quickly if you buy a treadmill, rack, specialty flooring, or electrical and finishing upgrades.
A few example budgets make the trade-offs clearer:
- Basic renter setup: mat, bands, adjustable dumbbells, and a small shelf — roughly $200 to $500
- Mid-range spare-room gym: rubber flooring, foldable bench, dumbbells, mirror, storage, and a bike — roughly $800 to $1,800
- Premium dedicated room: flooring, mirror wall, storage system, multiple machines, lighting upgrades, and heavier equipment — roughly $3,000 to $5,000+
The key decision is to buy in this order: protect the room first, then cover the main training tools, then add comfort and extras. That prevents the common problem of spending heavily on one machine while skipping flooring, storage, or ventilation.
Choose the Core Equipment for Your Goals
The right equipment depends on what you want the room to do most often.
For a strength-focused gym, start with:
- Adjustable dumbbells
- Resistance bands
- A foldable bench
- A storage rack or shelf
- A mat for floor work
For a cardio-focused gym, start with:
- An exercise bike, treadmill, or rower
- A mat or flooring under the machine
- A fan or airflow solution
- A place to store towels, water, and accessories
For a mixed-use gym, build around the most flexible items first:
- Adjustable dumbbells
- Resistance bands
- Foldable bench
- Yoga mat
- Compact storage
Optional upgrades can wait. A wall mirror is useful, but it is not as important as safe flooring. A rack can help organization, but it is less urgent than equipment that matches your training style. A treadmill may be a great addition, but only if the room can handle its footprint, power needs, ceiling height, and noise.
If you only have room for one major piece of equipment, choose the one you will use most consistently. That usually beats trying to squeeze in several machines that each get used occasionally.

Protect the Floor and Walls
Floor protection is one of the most important parts of converting a room into a gym. It helps reduce wear, protects the subfloor, and makes the room safer to use.
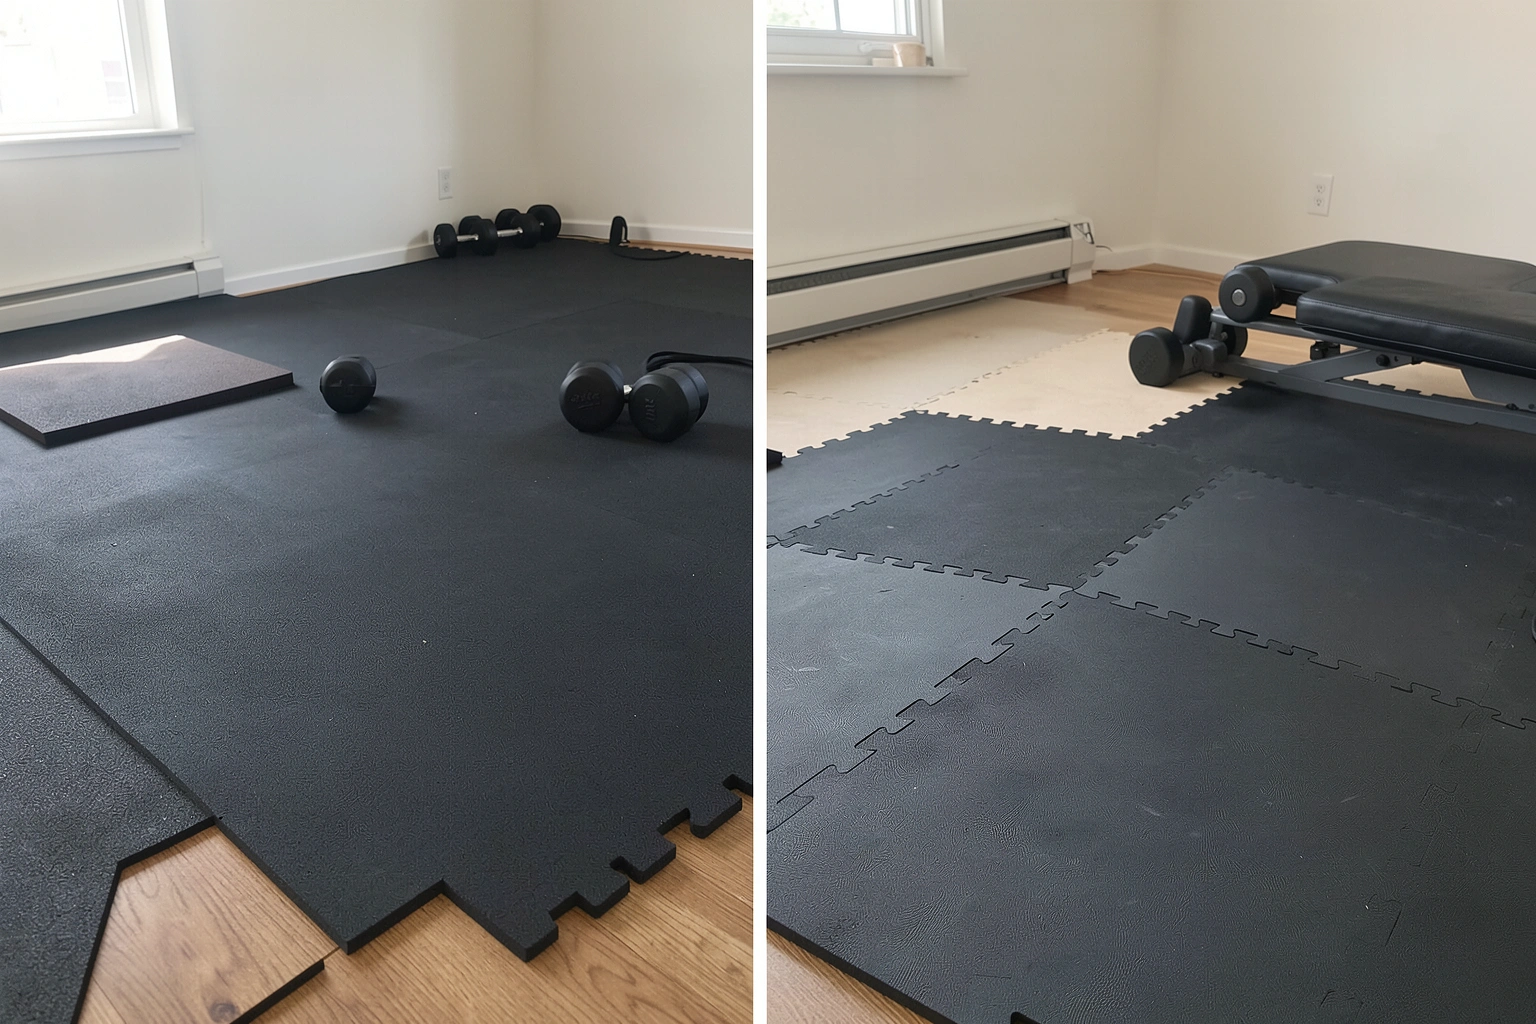
Rubber flooring vs foam tiles
Rubber gym flooring is usually the better choice for heavier equipment, dumbbells, and general durability. It tends to handle impact better and is often easier to keep stable under machines.
Interlocking foam tiles are softer and easier to install. They can work well for yoga, stretching, light bodyweight exercise, or a renter-friendly setup. The trade-off is that foam is not usually the best choice for dropped weights or heavier machines.
A simple way to choose:
– If you lift weights or use cardio machines, lean toward rubber flooring
– If you need a temporary, softer surface for light training, choose foam tiles
– If the room must remain multi-purpose, use a mat or removable tiles where you train most
For wall protection, think about what might hit or rub against the surface. Dumbbells, bench corners, and machine handles can leave marks. A mirror can make the room feel larger, but it should be placed where it will not get bumped during movement. If you are mounting mirrors or wall storage, follow the manufacturer’s instructions and use appropriate fasteners for the wall type.
If you are considering mounted equipment or storage, check your wall structure first. For anything heavy or load-bearing, review the product documentation and local building rules. When in doubt, a freestanding storage solution is simpler and safer.
Build Storage That Keeps the Room Usable
A gym becomes frustrating when equipment ends up on the floor. Storage is what keeps the room functional day to day.
The best storage plan is simple and visible. If you can see where each item belongs, you are more likely to put it back.
Good options include:
- A small rack or shelving unit for dumbbells and accessories
- Wall hooks for bands, jump ropes, and towels
- A basket or bin for smaller items
- A vertical stand for mats
- A foldable bench that can be moved aside after use
For a small room, vertical storage usually works better than wide furniture. In a basement or garage, shelving can hold more gear without taking over the workout area. In a bedroom, choose storage that still looks clean when the room is not being used as a gym.
Keep frequently used items easy to reach. Less-used items can go higher or lower on the shelf. That reduces clutter and keeps the main floor area open.
Improve Lighting, Ventilation, and Comfort
A room can technically function as a gym and still feel unpleasant to use. Lighting, airflow, and temperature make a big difference.
Natural light is helpful when available, but many gyms need more than one ceiling fixture. If the room feels dim, add layered lighting so the space is bright enough for movement and equipment setup. Brighter light also makes it easier to check form and avoid tripping over gear.
Ventilation matters even more in closed rooms, basements, and garages. Open windows when possible, use a fan to move air, and avoid blocking vents with equipment. If the room tends to get humid, moisture control becomes part of the setup because damp conditions can affect comfort and equipment over time.
Room-specific options can help:
- Basements: use a dehumidifier if moisture is a concern, add bright overhead lighting or floor lamps, and consider a fan to improve air movement
- Garages: use a fan, portable heater, or portable cooling option as needed, and expect greater temperature swings than in finished living spaces
- Rented bedrooms: prioritize quiet airflow such as a box fan, tower fan, or window fan if allowed, since permanent HVAC changes usually are not an option
For temperature and airflow guidance, it is worth checking practical building and indoor-air resources such as the U.S. Department of Energy, the EPA’s indoor air quality guidance, and manufacturer instructions for any cardio machine or fan you install. Those sources can help you make better decisions without guessing at what the room needs.
Comfort also includes the small things: a towel hook, a water bottle shelf, and a place to set your phone or timer. Those details keep the room organized and reduce interruptions during workouts.
Reduce Noise and Protect the Rest of the Home
Noise is a bigger issue than many people expect, especially in apartments, upstairs rooms, and shared homes.
The simplest way to reduce noise is to choose equipment that creates less impact in the first place. An exercise bike is usually quieter than running on a treadmill. Controlled dumbbell use is usually quieter than dropping weights. A yoga or mobility setup is quieter than a jumping or high-impact routine.
Flooring helps too. Rubber flooring generally does a better job than thin foam at reducing vibration from equipment and footfall. Putting a machine on a mat can also help isolate movement and protect the floor underneath.
Placement matters as well:
– Put noisy machines away from shared walls when possible
– Avoid placing equipment directly under a bedroom if vibration is a concern
– Keep speakers and fans at a reasonable volume
– Use slower, controlled movements if neighbors or family members are nearby
If the room is in a garage or basement, you may still need to think about sound transfer through walls, doors, and floors. For more detailed noise-control guidance, the Acoustical Society of America is a useful reference point for general sound and vibration concepts.
Make the Setup Safe and Renter-Friendly
Safety should be built into the layout, not added later.
Leave enough clearance around every piece of equipment so you can move without twisting around corners or bumping into walls. Check the manufacturer’s instructions for any treadmill, rack, bench, or mounted accessory before finalizing placement. Ceiling height matters too, especially if you plan to do overhead presses, jumping movements, or pull-up style exercises.
A practical safety check:
– Keep at least a few feet of open space where you step, swing, or dismount
– Leave extra room behind treadmills, benches, and cardio machines
– Make sure overhead movements do not put your hands or equipment too close to the ceiling
– If a machine folds or moves, confirm that it still has clearance in both positions
Ceiling height is especially important for common equipment:
– Treadmills: higher ceilings are more comfortable if the deck sits elevated or if the user is tall
– Benches and overhead pressing: allow enough headroom for the bar or dumbbells to travel safely
– Pull-up bars or suspension trainers: check both ceiling height and the amount of space above and around the movement path
Upper-floor rooms deserve extra caution. Heavy equipment and repeated impact can create more load and vibration than a light-use room. If you are unsure whether the floor can support your intended setup, get guidance before adding heavy machines, dense storage, or multiple pieces of equipment in one area.
For renters, keep changes truly removable whenever possible:
Good removable options
– Interlocking foam tiles
– Rubber gym flooring mats or rolls that can be lifted later
– Freestanding shelving or a movable rack
– Leaning mirrors or mirrors designed for temporary placement
– Command-style hooks or adhesive organizers that are approved by the manufacturer and safe for the surface
– Foldable equipment that stores without wall attachment
Semi-permanent options to avoid unless the lease clearly allows them
– Wall-mounted racks or shelves
– Bolting equipment into floors or walls
– Permanent adhesive flooring
– Drilling into drywall, tile, brick, or concrete without permission
– Electrical changes or built-in fixtures
If wall mounting is not allowed, use freestanding storage, leaning mirrors, and equipment that does not require anchors. If a landlord or HOA has rules about floor coverings, noise, or alterations, check those before buying equipment. It is easier to adjust the plan early than to undo it later.
Add Simple Motivation and Finishing Touches
A gym does not need to look dramatic to feel motivating. Small, practical finishes are enough.
A mirror can make a small room feel more open and help with form checks. Neutral or darker flooring can make the room look cleaner between sessions. A consistent color palette also helps the room feel less like storage and more like a dedicated space.
Keep decor minimal. One or two framed pieces, a clean wall color, or a single accent light can improve the room without taking away from function. The goal is a space you are willing to use regularly, not a room that looks staged but is hard to work in.
Example Room-by-Room Setups
Small bedroom gym
A small bedroom works best as a compact strength and mobility space. Use a yoga mat, adjustable dumbbells, resistance bands, and a foldable bench. Keep one wall open for movement and use a slim shelf for storage. If the room must still function as a bedroom, choose gear that can be tucked away quickly. A 6 x 8 ft or similar corner can work for mat-based training and a few compact weights, but it will feel tight once you add larger machines.
Basement gym
A basement can support a mixed-use setup, but only if the conditions are workable. Rubber flooring, a mirror, a bike or rower, dumbbells, and wall storage can make sense here. Focus on moisture control, brightness, and organization so the room feels finished rather than unfinished. If the basement is damp, cold, or low-ceilinged, keep the layout simpler and avoid oversized equipment.
Garage gym
A garage is often best for a more durable setup. Use flooring that can handle equipment, a treadmill or bike if space allows, and sturdy storage for weights and accessories. Plan for temperature changes and make sure the equipment placement does not interfere with parking or access. A garage works best when you can leave a clear path for doors, vehicles, and walkways.
Renter-friendly apartment setup
For renters, keep everything removable. Interlocking foam tiles, a yoga mat, resistance bands, adjustable dumbbells, and a foldable bench can create a useful training space without permanent changes. A compact storage bin or freestanding shelving unit keeps the room tidy. If you cannot mount anything, use a leaning mirror or a freestanding mirror instead of drilling into the wall.
Common Mistakes to Avoid When Converting a Room Into a Home Gym
The most common mistakes are easy to avoid once you know what to look for:
- Buying equipment before measuring the room
- Ignoring ceiling height and movement clearance
- Choosing flooring that does not match the workout type
- Filling the room so tightly that it becomes hard to use
- Skipping storage and letting gear pile up
- Forgetting about ventilation and heat buildup
- Overlooking noise transfer to other rooms or neighbors
- Making permanent changes when a renter-friendly setup would have been better
- Placing equipment near doors, vents, or walkways
- Adding specialty gear before covering the basics
A functional home gym is usually simple, organized, and matched to the room you actually have. If the layout is safe, the flooring is appropriate, and the equipment fits your goals, the space will be far more useful than a crowded room full of unused machines.
When to Consult a Professional
You do not need a contractor for every home gym, but some situations deserve expert help. Consider consulting a professional if you plan to mount heavy equipment to walls or ceilings, install electrical work, place heavy machines on an upper floor, or make changes that may affect building rules, lease terms, or structural load. If moisture, mold, or major temperature problems are involved, a specialist may also be worthwhile.
A home gym works best when the room supports the workout instead of fighting it. Measure first, choose equipment second, and build the space around safe movement, storage, and comfort.