
Home Gym Installation Tips: A Practical Guide for Safe Setup

Setting up a home gym is less about buying equipment and more about making sure the room can support it safely. The best installation choices depend on the space, the floor, the equipment, and how permanent you want the setup to be. A garage, basement, spare room, or rented apartment each comes with different limits, and those limits should shape every decision that follows.
A well-planned gym protects the building, reduces noise, and makes the equipment easier to use. A rushed setup often creates the opposite: cramped walkways, vibration, damaged flooring, and equipment that feels unstable. If you want a setup that lasts, the installation work matters as much as the gear itself.
Start With the Space You Have
The first decision is where the gym belongs. A garage is often the easiest place for heavy equipment because it usually offers more open floor area and simpler entry for large items. The trade-off is temperature swings, dust, and sometimes less privacy.
A spare room works well for lighter or mixed-use setups. It is easier to control lighting, climate, and privacy, but the room may have lower ceilings, softer flooring, and tighter doorways. That matters if you plan to bring in a power rack, treadmill, or cable machine.
Basements can be a strong option if the slab is sound and moisture is controlled. They often offer good ceiling clearance for moderate equipment, but you may need to think more carefully about humidity, ventilation, and sound transfer. In a shared home, basement noise can travel upward more than expected.
Rented spaces need the most caution. If you cannot drill, anchor, or make permanent floor changes, focus on freestanding equipment, removable flooring, and setups that can be moved without damage. That usually means avoiding wall-mounted racks, fixed mirrors, or anything that requires structural attachment unless the landlord approves it in writing.
Quick room comparison
| Space | Strengths | Limitations | Best fit |
|---|---|---|---|
| Garage | Open layout, easier access | Temperature, dust, noise | Heavy lifting, racks, cardio equipment |
| Spare room | Controlled environment, privacy | Smaller footprint, softer surfaces | Dumbbells, bench work, compact machines |
| Basement | Good for heavier setups if dry and stable | Moisture, ventilation, sound transfer | Mixed-use gyms, racks, mats, cardio |
| Rented space | Flexible and temporary | Limited drilling and modification | Freestanding, renter-friendly setups |
A practical rule: if you cannot move around the equipment with a loaded bar, bench, or treadmill in place, the room is too tight.
Measure Clearance, Traffic Flow, and Ceiling Height
Before buying or assembling anything, measure the room like a layout project. Equipment dimensions alone are not enough. You also need space for movement, loading plates, pulling benches out, and stepping away from moving parts.
For a power rack or squat rack, check both the footprint and the working area around it. A practical starting point is to leave about 2 to 3 feet of open space on the sides and front where possible, with extra room behind the rack if you will walk plates or a bench through that area. If the rack will sit near a wall, leave enough space to avoid scraping knurling, plates, or safety arms against drywall.
For a treadmill, the machine’s running belt is only part of the equation. A common planning range is about 2 to 3 feet of clearance on the sides and several feet behind the treadmill so a user can step off safely. Manufacturer manuals usually include clearance guidance, and those instructions should take priority over general advice.
For an adjustable bench, allow enough room to pull the bench out, change incline positions, and walk around it without turning sideways. In many rooms, leaving roughly 2 feet on the sides and 3 feet or more at the front or rear is enough for basic use, but the exact space depends on the rack, dumbbells, and how the bench will be used.
For a cable machine, allow enough room for the weight stack or pulley travel, plus a clear path for handles and attachments. A cable machine placed too close to a wall can pinch hands, bend attachments, or limit range of motion. As a planning guide, leave several feet of open working space in the direction the cables travel and enough side clearance to move without brushing the frame.
Ceiling height matters more than many first-time buyers expect. A power rack with pull-up options, an overhead press, or a rowing machine may require more vertical room than the equipment listing suggests. Measure from floor to ceiling, then subtract flooring thickness, ceiling fixtures, and any overhead obstructions such as ducts or beams.
A helpful habit is to tape the footprint on the floor before assembly. That shows whether a bench can slide out, whether a dumbbell rack blocks the path, and whether two people can move around the space without turning sideways.
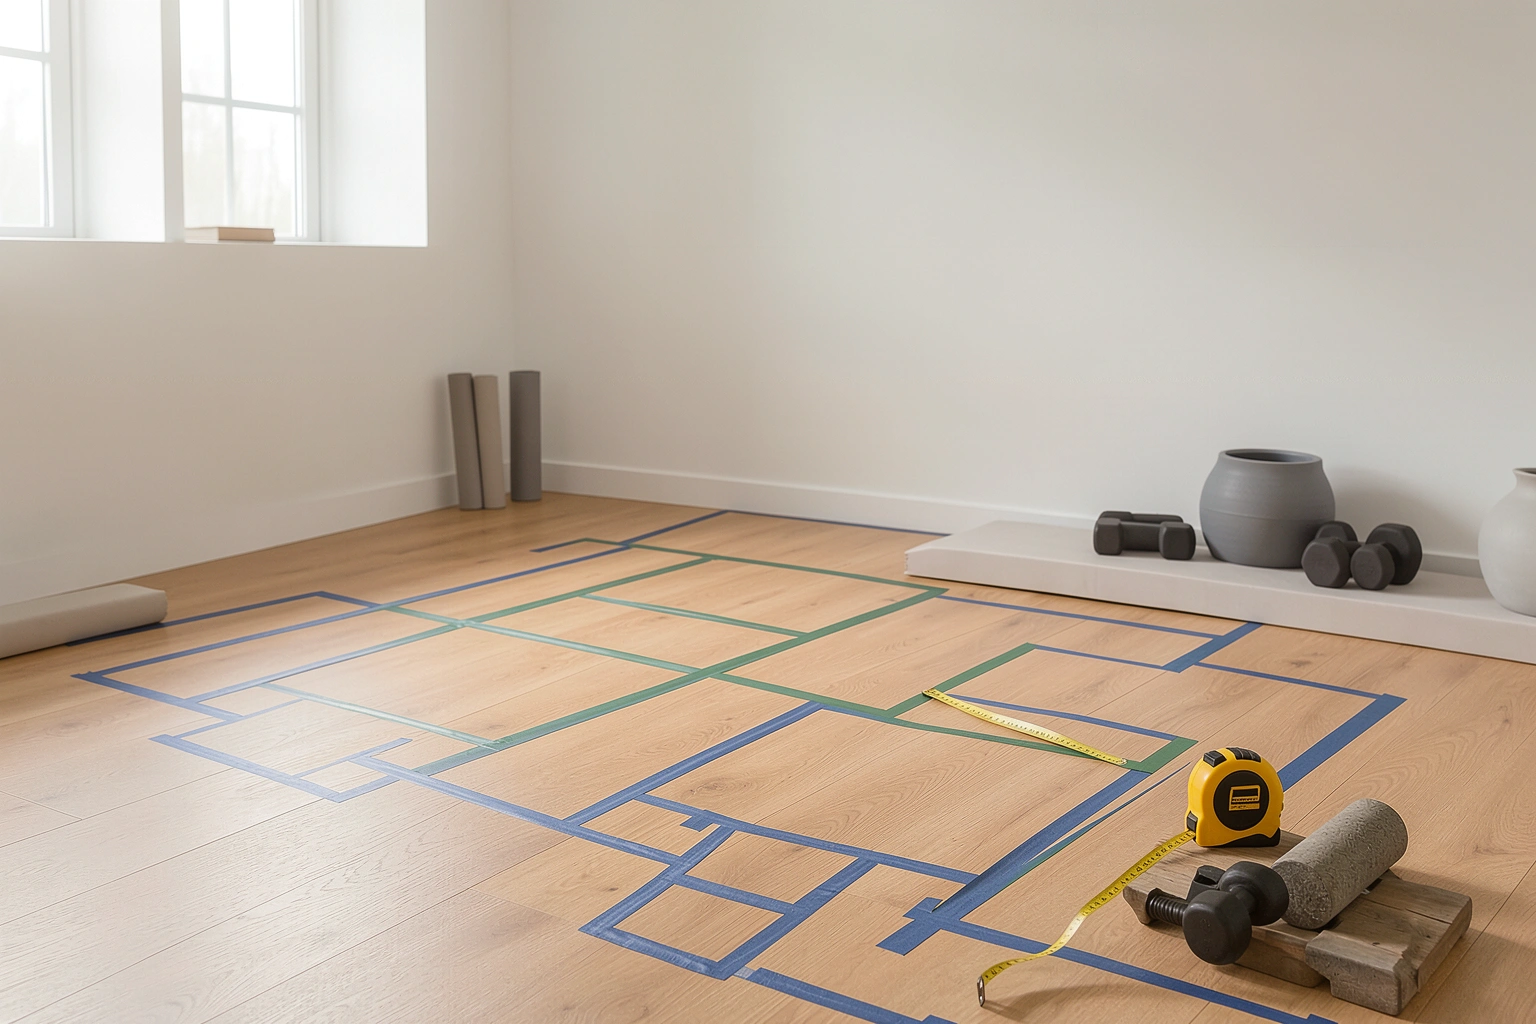
Practical layout tip: keep a clear walking lane from the door to the main lifting area. If the entry path crosses behind a treadmill or between a rack and a wall, the room will feel crowded even if the measurements technically fit.
Check Floor Strength and Structural Limits
Floor strength is one of the most overlooked parts of home gym installation. Heavy equipment, dropped weights, and repeated impact can stress a floor differently than normal furniture does. A room may technically hold the weight of a rack and plates, but still not be a good place for repeated lifting if the structure flexes or vibrates.
Concrete slabs are generally more forgiving for heavy equipment than wood-framed floors, but even concrete can have limitations depending on condition, moisture, and surface finish. Upper floors deserve extra caution because the load is distributed through joists and subflooring, not a slab.
Here is a practical way to judge the situation:
- You can usually proceed on your own if the equipment will sit on a concrete slab or a clearly solid, level floor, and the setup is light to moderate with no major impact use.
- Proceed carefully and keep the load spread out if the floor is wood-framed but the equipment is relatively compact, the room is near a support wall or beam, and you are using rubber gym flooring to distribute weight.
- Consult a structural professional or qualified contractor if the gym will go on an upper floor, if the floor feels bouncy or uneven, if you plan to use a power rack, weight plates, a treadmill, or other heavy machines, or if you are unsure how the joists and supports run beneath the room.
- Get professional input before moving forward if the space is an apartment, condo, balcony, older home, or any area where you cannot confirm the structure and load path.
The presence of a “load-bearing floor” does not automatically mean every area is equally strong. The exact joist direction, span, and support points matter. If you do not know those details, keep the heaviest items near structural supports when possible and avoid placing them in the center of a long unsupported span.
For a second-floor gym, vibration control matters almost as much as raw strength. Even if the floor can support the load, repeated impact can create noise and movement that affect the room below.
If you need a general reference for code or inspection guidance, resources from the International Code Council and OSHA can help frame structural and safety expectations, though they do not replace local building advice for a specific room.
Choose the Right Flooring for Protection and Stability
Flooring does three jobs in a home gym: it protects the subfloor, improves stability, and reduces noise. The best material depends on whether the room needs impact protection, grip, easy cleaning, or renter-friendly installation.
Rubber gym flooring
Rubber gym flooring is the most versatile choice for many setups. It handles dropped dumbbells better than soft materials, offers stable footing under racks and benches, and is easier to clean than carpet. It is a strong option for garages, basements, and lifting areas.
Interlocking floor tiles
Interlocking floor tiles are useful in smaller rooms because they are easier to install and replace in sections. They work well when you want a neat finish and modular coverage. The downside is that seams can shift if the subfloor is uneven, and thinner tiles may not absorb heavy impact as well as denser rubber.
Stall mats
Stall mats are popular in garage gyms because they are durable and cover a lot of space with fewer seams. They are heavier and less convenient to move, but that weight can be an advantage in a permanent setup. They are often a practical choice when you want simple coverage under a rack or lifting platform.
Foam flooring
Foam flooring is softer and more comfortable for bodyweight work, stretching, or light exercise. It is not the best choice under heavy racks, dumbbells, or machines because it compresses too easily and can make equipment feel unstable.
Carpet tiles
Carpet tiles can be renter-friendly and comfortable, but they are usually a better fit for light use than for heavy lifting. They help with sound absorption, yet they do not offer the same impact protection or stability as rubber.
Flooring comparison
| Flooring type | Stability | Impact protection | Noise control | Renter-friendly | Best use |
|---|---|---|---|---|---|
| Rubber gym flooring | High | High | Good | Medium | Racks, benches, mixed gyms |
| Interlocking floor tiles | Medium to high | Medium | Good | High | Spare rooms, modular setups |
| Stall mats | High | High | Good | Low to medium | Garage gyms, heavy equipment |
| Foam flooring | Low to medium | Low | Fair | High | Stretching, light bodyweight work |
| Carpet tiles | Medium | Low to medium | Good | High | Light-use rooms, temporary setups |
If your setup includes a power rack or dumbbell area, choose a firmer surface over a soft one. Soft flooring may feel comfortable at first, but it can make a bench wobble and reduce confidence under load.
Plan Wall, Ceiling, Power, and Ventilation Needs
Walls and ceilings matter because home gym equipment often needs attachment, protection, or clearance. Before installation, locate studs with a stud finder and confirm where you can safely anchor equipment. Wall anchors should match the wall type and the load they will carry. Drywall alone is not a safe attachment point for most racks, pull-up bars, or heavy mirrors.
Mirror panels are a good example of why planning matters. Large mirrors can improve visibility for form checks, but they should be mounted where they will not be hit by bars, benches, or plates. If the room is tight, place mirrors on a wall that stays outside the equipment swing zone.
Power needs are often underestimated. Treadmills, bikes with electronics, rowers, and some cable machines may need a nearby outlet that does not create a trip hazard. Keep cords out of walkways and avoid overloading a single strip with multiple high-draw devices. In wet or potentially damp areas such as garages and basements, a GFCI outlet may be appropriate depending on local code and location; electrical requirements should always follow the manufacturer instructions and local rules.
Ventilation also affects both equipment and comfort. A room with poor airflow can feel hot quickly, and humidity can shorten the life of flooring, metal components, and electronics. If the gym is enclosed, consider whether you need a fan, better air exchange, or dehumidification. For garages and basements, this can make the difference between a usable gym and one that feels stale or damp.
Gather the Tools, Materials, and Prep Supplies
Good installation work goes faster when the tools are ready before assembly begins.
Essential tools
- Stud finder
- Tape measure
- Level
- Drill and drill bits
- Socket set or wrench set
- Screwdrivers
- Rubber mallet
- Utility knife
Flooring materials
- Rubber gym flooring, interlocking floor tiles, stall mats, foam flooring, or carpet tiles
- Fasteners and wall anchors matched to the wall type
- Floor protection materials
Optional safety items
- Safety glasses
- Gloves
- Cleaning supplies for dust and debris
- Straightedge for trimming flooring edges
If you are installing rubber mats, tiles, or stall mats, have a straightedge and utility knife ready for trimming edges. If you are mounting mirrors or wall hardware, use the correct anchors and fasteners for the wall structure rather than improvising with general-purpose screws.
Before assembly, clear the room completely and clean the floor. Dust, grit, and debris can cause uneven equipment placement and can scratch flooring during installation. If the floor is not level, address that before tightening down racks or placing precision equipment.
Install and Assemble Equipment Safely
Different pieces of equipment need different installation approaches, but the same basic rule applies: follow the manufacturer instructions exactly, especially for assembly order, torque values, and safety checks.
Power racks and squat racks
A power rack should sit on a flat, stable surface and be assembled square before any bolts are fully tightened. Check that uprights are plumb and that safety arms or spotter arms are positioned correctly. If the rack is designed to be anchored, do not skip that step. Anchoring helps reduce tipping and shifting during use.
Treadmills
Treadmills need a level surface, adequate clearance, and a power source that matches the manufacturer requirements. Make sure the belt area is unobstructed and that the machine is not placed where a user could collide with a wall or shelf after stepping off. If the treadmill has transport wheels, confirm that the final position still allows maintenance access.
Adjustable benches
Bench stability depends on the floor and the bench feet. Place the bench on a surface that does not rock or slide. If the bench will be used inside a rack, confirm that the bench height and position align with the rack’s bar path and safeties.
Dumbbell racks
Dumbbell racks should be placed where loading and unloading do not block the main walkway. Heavier racks belong near the wall or in a corner only if the floor is stable and the path to them remains clear. If the rack can tip when drawers or tiers are loaded unevenly, anchor or stabilize it as directed by the manufacturer.
Cable machines
Cable machines often need careful leveling and, in some cases, anchoring. Pulley alignment matters because a machine that is slightly out of square can create uneven cable travel and unnecessary wear. Make sure the handles move freely without contacting nearby walls, mirrors, or shelving.
Mirror panels
Mirror panels should be installed only after the wall surface is verified and the mounting method is correct for the panel weight and wall type. Keep them out of zones where equipment could strike them. In tighter rooms, partial mirror coverage is often safer than full-wall placement.
A useful reference point for equipment assembly and maintenance is the manufacturer documentation itself. For example, many brands publish installation diagrams, fastener guidance, and periodic inspection steps online. Those instructions should override generic setup advice because they are specific to the frame, hardware, and load design.
Reduce Noise, Vibration, and Wear
Noise reduction matters in apartments, condos, shared homes, and any room above living space. The main goal is to keep the gym from shaking the structure or transmitting repeated impact into other rooms.
Vibration isolation can help under treadmills, racks, and weight areas. Dense rubber flooring is usually more effective than soft foam for controlling impact while still keeping equipment stable. If the floor is especially sensitive, place heavier equipment over structural supports when possible and avoid stacking all the impact-heavy items in one small zone.
Spacing also affects noise. Equipment that touches a wall can transmit vibration directly into the structure. Leave a small buffer where possible, especially behind treadmills and beside cable machines. That gap also makes cleaning and maintenance easier.
For shared-wall situations, avoid placing speakers, dropped-weight zones, or cardio machines directly against the wall you share with a neighbor. If the setup is in a basement, consider how sound travels through joists and ducts as well as through the floor itself.
Renter-Friendly Setup Options
If you rent, focus on choices that protect the property and can be removed later without leaving marks. Non-permanent flooring is usually the best starting point. Interlocking floor tiles, loose-laid rubber gym flooring, and carpet tiles can all work if they sit flat and do not trap moisture underneath. In many cases, you can also use area rugs or mats under lighter equipment as long as they do not slide.
Freestanding equipment is usually the safest choice for renters. Adjustable benches, dumbbell racks, compact cardio machines, and portable cable systems can often be moved without drilling or anchoring. If you want a more complete setup, choose equipment that stabilizes through weight and footprint rather than wall attachment.
To avoid wall and floor damage without drilling:
– Keep a small gap between equipment and walls
– Use rubber feet, pads, or mats under contact points
– Avoid dragging machines across finished floors
– Protect door frames and corners during delivery and assembly
– Check that mirrors, shelves, and accessories are truly freestanding before loading them
– Use removable cord covers or routing that keeps cables out of the walkway
If you need to place a heavy item on a finished floor, spread the weight with rubber flooring or a protective base rather than setting metal feet directly on the surface. That is especially helpful for treadmills and rack-style equipment.
Avoid the Most Common Home Gym Installation Mistakes
Most installation problems come from planning shortcuts, not bad equipment. The most common mistakes include:
- Measuring only the equipment, not the working space around it
- Choosing flooring that is too soft for lifting
- Skipping structural checks on upper floors
- Mounting equipment into drywall instead of studs or approved structural points
- Crowding the room so walkways disappear
- Ignoring power cord placement
- Assembling on an uneven surface
- Overlooking humidity, ventilation, or temperature changes
- Forgetting landlord or HOA restrictions before drilling
- Tightening everything before the frame is square
One of the easiest mistakes to avoid is buying equipment before confirming ceiling height and doorway width. Large racks and treadmills can fit on paper and still fail at the doorway, stairwell, or final assembly stage.
Decide Between DIY and Professional Installation
DIY works well when the equipment is freestanding, the floor is level, and the assembly instructions are straightforward. A bench, dumbbell rack, or simple treadmill setup usually falls into this category if you are comfortable with basic tools.
Professional installation makes more sense when the job involves wall anchoring, ceiling mounting, electrical changes, structural uncertainty, or very heavy equipment. It is also worth considering if the room is rented and you need the setup to be removable without damage. In those cases, an installer can help choose a method that fits the space and the restrictions.
On cost, DIY usually saves on labor, but you may still spend on tools, anchors, flooring, delivery help, or extra hardware. Professional installation adds labor costs, and the price can rise if the job includes anchoring, electrical work, flooring prep, or complicated assembly. As a rough budgeting approach, simple DIY setups are often the lowest-cost option, while professional installation is usually the better fit when you want convenience, speed, or help with structural and code-related concerns.
A practical decision rule: if the work affects structure, wiring, or load-bearing concerns, get qualified help. If it is mainly assembly and placement, DIY may be reasonable as long as you follow the instructions and double-check the setup.
Finish With a Safety Check and Maintenance Routine
Before the gym is used, inspect every major component with a slow, careful walkthrough. Check that:
- Racks are level and fully tightened
- Anchors are secure where required
- Mats or tiles are flat and not shifting
- Cords are out of walkways
- Mirrors are stable and clear of impact zones
- Machines move smoothly without rubbing walls or flooring
- Clearances are still open after full assembly
After the first few uses, recheck bolts, fasteners, and floor placement. Equipment can settle slightly, especially on new flooring. Regular upkeep should include wiping dust from moving parts, checking for floor wear under feet or posts, and confirming that vibration has not loosened hardware.
For manufacturer-specific maintenance intervals, follow the manual rather than guessing. Some machines need periodic bolt checks or belt adjustments, and those steps are part of safe long-term use.
When to Consult a Professional
Bring in a professional if the gym will go on an upper floor, if the floor feels bouncy or uneven, if you need electrical upgrades, or if the installation requires wall or ceiling anchoring you are not comfortable doing correctly. The same applies if you are unsure about local code, landlord restrictions, or whether the room can handle the equipment load.
A home gym should feel stable, quiet enough to live with, and easy to use every day. Careful installation is what makes that possible.